Middle Eastern Vegetable Bake

Middle Eastern Vegetable Bake
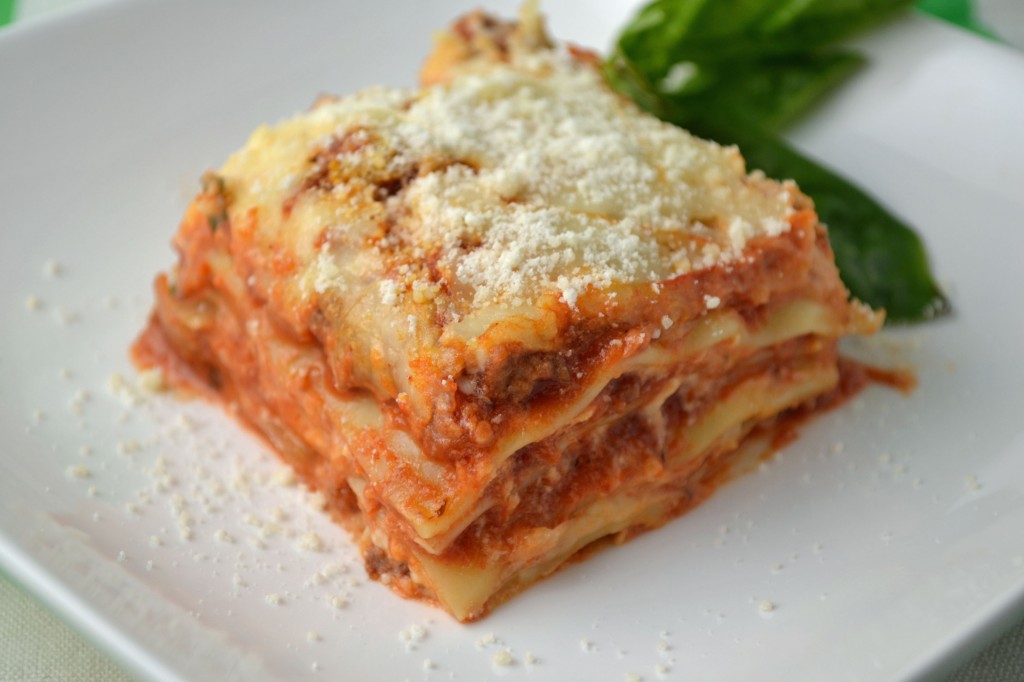
It can be difficult to eat healthy this time of year. Especially here in the Northeast where we just made it through one of the coldest February’s on record. Heavier fatty foods like mac and cheese or meatloaf and mashed potatoes are often enticing while really fresh produce is harder and harder to find. We have to remind ourselves to “eat your vegetables” like our mothers always said, because the idea of a salad for lunch when it’s 5 degrees outside, just doesn’t cut it. Enter the Middle Eastern Vegetable Bake. This vegetable mélange is the solution to healthy eating and cold weather cravings – with a touch of warmth.

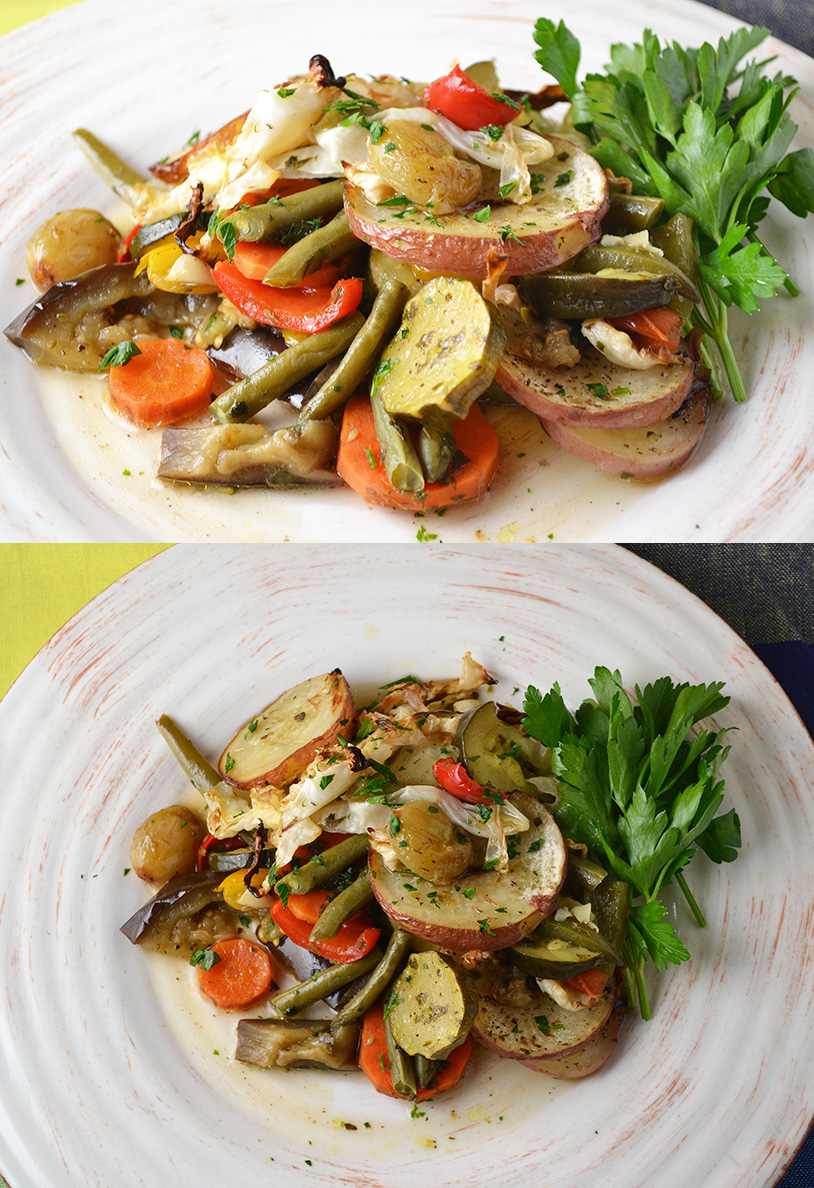
An old-fashioned recipe, straight from “The Art of Good Cooking,” by my grandmother Paula Peck – this is a healthy lunch or side dish that is sure to provide those daily servings of vegetables you’re missing. Easy-to-find vegetables like zucchini, eggplant, red pepper, cabbage, onion, potatoes, and carrots are thrown together into a casserole then baked until softened and the flavors are combined. The fragrant aroma of garlic and fresh parsley fills the kitchen as it bakes. Any excuse to use the oven to help heat the house up this time of year is a bonus but the resulting guiltless veggie dish makes it even better.

I’m not sure what makes this dish Middle Eastern – if I had to guess, it would be the addition of grapes. It sounds a bit strange but baked grapes add a sweetness that the other vegetables are missing and balances the dish. The different textures and juices of the vegetables in this simple casserole, will make remembering to eat your vegetables this winter, a much easier task.

Middle Eastern Vegetable Bake

Middle Eastern Vegetable Bake

Ingredients

½ cup olive oil
1 small eggplant, cut in cubes
2 small tomatoes, sliced ½ inch thick
1 medium zucchini, cut in ½ inch slices
1 medium red pepper, cubed
8 cloves of garlic, sliced
1 onion, sliced
3 stalks of celery, diced
1 cup shredded cabbage
1 cup diced green beans
3 carrots, peeled and sliced into ¼ inch slices
2 medium red potatoes, peeled and cut into ½ cubes
1 cup seedless grapes
1 cup chopped fresh Italian parsley
1 teaspoon dried oregano
1 teaspoon dried basil
½ teaspoon crumbled bay leaf
salt
pepper
hot sauce (optional)

Instructions

Preheat oven to 350 degrees.

Pour a few tablespoons of the olive oil in a large casserole or baking dish. Make one individual layer of each of the vegetables (including a layer of garlic) and grapes, seasoning each layer with salt, pepper, parsly, oregano, basil, bay leaf, and a little olive oil. Make the top layer an assortment of all of the vegetables. Bake uncovered for 30-50 minutes or until all vegetables are tender. Serve warm with hot sauce (if using).

Serves. 8

Buffalo Fried Calamari with Ranch Dip

Fried Buffalo Calamari with Homemade Ranch Dip

Beer and fried food – it may be an American cliché but as the superbowl approaches, it’s hard to resist this game-time tradition. Fried calamari has become a favorite restaurant appetizer. It’s often sandwiched between wings and mozzarella sticks on restaurant and pub menus. This buffalo fried calamari recipe combines the best of classic buffalo wings and traditional fried calamari to make one spicy indulgent party appetizer.

Of all the recipes on my site, Fried Calamari with Two Dipping Sauces remains one of the most popular (yes I’m surprised too since I barely knew how to use a camera back then). So when I had buffalo fried calamari at a popular pizza restaurant, I was inspired. I wanted this dish to have a fresh and clean taste so I was determined to make each component from scratch. Somehow this makes me feel healthier when consuming a gazillion calories (the superbowl counts as a special occasion, right?). Of course, making everything from scratch isn’t necessary but I love adding fresh herbs to homemade ranch dressing (you can use blue cheese dip if you prefer) and having the ability to control the heat and spiciness of the buffalo sauce.

Unlike the heavy beer batter I’ve used previously to coat the calamari, I opted for a light flour coating to offset the additional layer the buffalo sauce adds. I simply marinated the cleaned cut squid in buttermilk for extra tenderness and coated it in lightly salted flour. After frying, the squid remains tender with a light crunch and can be easily tossed in the buffalo sauce. Eat while still hot and dip in the cool creamy ranch dip. The fried tender calamari with the heat of the spicy buffalo sauce and refreshing garlicky ranch dip is a dangerously tasty combination that’s sure to distract you from the game.

Fried Buffalo Calamari

Buffalo Fried Calamari with Ranch Dip

Buffalo Fried Calamari with Ranch Dip

Ingredients

Fried Calamari
1 lb cleaned squid
2 cups buttermilk
vegetable oil for frying
1 ½-2 cups all purpose flour
1 teaspoon salt
 
Ranch Dip
1 clove garlic, minced and pressed into a paste
1/2 cup sour cream
3/4 cup mayonnaise
3/4 cup buttermilk
1 tablespoon lemon juice
1/4 teaspoon Worcestershire
3 scallions, chopped
¼ cup chopped parsley
2 tablespoons chopped basil (optional)
1 teaspoon salt
1/2 teaspoon pepper
Dash of hot sauce
 
Buffalo Sauce
1 clove garlic
6 tablespoons butter
3/4 cup hot sauce
1 tablespoon white vinegar
1/2 teaspoon Worcestershire sauce
1/2 teaspoon onion powder
1/4 teaspoon garlic powder
1/4 teaspoon cayenne powder

Instructions

Make the ranch dip and the buffalo sauce.

To Make the Ranch Dip:

Combine garlic paste, sour cream, and mayo in a medium size mixing bowl. Stir in buttermilk, lemon juice, and Worcestershire. Mix in scallions, parsley, basil (if using), salt and pepper, and hot sauce. Chill and serve cold.

To Make the Buffalo Sauce:

Melt butter with whole garlic clove in a small saucepan over medium-low heat. Whisk in hot sauce. Bring to a simmer. Whisk in vinegar, Worcestershire, onion, powder, garlic powder, and cayenne powder. Remove garlic clove. Keep warm until ready to use.

For the calamari:

Clean and cut squid in rings. Place in a large bowl. Pour enough buttermilk in the bowl to cover the squid. Cover and chill for 1 hour.

Pour flour and salt into a shallow dish or pie plate. Drain calamari and toss in flour to coat.

Heat 2-3 inches of oil in a dutch oven or large heavy pot to 375 degrees.

Carefully add the squid to the oil. Fry until just lightly golden, about 1-2 minutes. Remove with a slotted spoon and drain on paper towels.

Place calamari in a clean bowl and lightly toss with buffalo sauce until just barely coated. Transfer to another bowl or plate and serve with ranch dip for dipping.

Avocado Grapefruit Fennel Salad

Avocado Grapefruit Fennel Salad

With the holidays behind us, we feel guilty about our episodes of gluttony. Though it may not last more than a week or two, we make New Years resolutions to exercise more and eat better. The gyms are packed and there’s that buzz about kale, quinoa, chia, and other healthy super foods. Since grapefruit is said to have properties that help reduce belly fat and we have all heard about the health benefits of avocado, I present you with this light Grapefruit, Avocado, and Fennel salad. A salad reminiscent of summer yet perfect for your post-holiday health kick, no matter how short it is.

You may be thinking that this healthy salad seems too modern to have any connection to my grandmother and the early American foodies. However, I actually found this recipe, in it’s most basic form (no fennel), in “The James Beard Cookbook,” by James Beard. I’m not sure of its history before his cookbook but to me, this qualifies grapefruit and avocado salad as a classic.

I made just a few modifications to the original recipe. I added fennel, which provides a crispy crunch and a licorice flavor gives the salad a light freshness. You can pick whichever vinaigrette you prefer but I opted from a lemon one made with fresh lemon juice and olive oil (which also helps preserve the color of the avocado). Want an extra kick? Try adding a little onion and chili flakes. All of your sweet, savory, and spicy bases are then covered.

Another fun and surprising aspect of this super simple salad is its seasonality. Yes, it’s somewhat seasonal. It may look like a summer salad that’s perfect for a hot day (which it can be), but grapefruit will be at its peak soon – making it cheaper, sweeter, and juicier than it is the rest of the year. So pick your favorite, white or ruby red, and whip up this light refreshing salad for lunch. With the superbowl right around the corner, the return of your favorite greasy appetizers will come sooner than you think.

Avocado Grapefruit Fennel Salad
 
Author:
Serves: 4
Ingredients
  • ⅓ cup freshly squeezed lemon juice
  • ⅔ cup extra virgin olive oil
  • 1 tablespoon dijon mustard
  • 1 teaspoon salt
  • ½ teaspoon ground black pepper
  • 2 grapefruits
  • 1 fennel bulb
  • 2 avocados
  • dried basil (optional)
Instructions
  1. Pour lemon juice into a small mixing bowl and slowly add olive oil in steady stream, while whisking to emulsify. Whisk in dijon mustard, salt, and pepper. Set aside.
  2. Peel and segment grapefruit with a sharp knife, ensuring all white pith is removed. Place segments in a medium mixing bowl. Thinly slice fennel and add to the grapefruit. Slice or dice avocado and add to the mixture.
  3. Drizzle vinaigrette over salad and lightly toss to combine. Season with additional salt and dried basil (if using). Serve immediately.

Grapefruit Avocado Fennel Salad

The Best Recipes of 2014

It’s been an interesting year. From the disappearance of Malaysia flight 370 to the Ebola outbreak and many other poignant news stories, those compiling this year’s lists of highlights and countdowns have their work cutout for them. Since I’ve never done a list of highlights on this blog before but I always catch myself reading those that I come across,  I thought I would give it try – for my recipe posts, not news events of course (I have no business discussing those). So I went back and reviewed the roughly 30 recipe posts of 2014 and picked my favorite 5 recipes, almost exclusively based on taste. Yes, pretty photos and writing are important but what we really want is a darn tasty recipe, right?

Before we get to the top 5 picks, other notable highlights of 2014 for Megan Peck Cooks include the a few stories I wrote for Edible Magazine:

Striped Bass Plaki on Edible East End  – a story about my grandmother’s amazing whole striped bass dish made with local Eastern Long Island seafood.

Linzer Torte on Edible Manhattan (featured in the Holiday Issue) – holiday memories surrounding my grandmother, Paula Peck’s, festive cocoa scented Linzer Torte Recipe.

I also had the honor of participating in the research for “1000 Foods to Eat Before You Die,” by Mimi Sheraton – just recently released and can be purchased on amazon (available in bookstores January 13th).  It was such a pleasure to work with Mimi Sheraton, a good friend of my grandmother’s.

Now for my top 5 recipe posts of 2014:

Classic Baked Lasagna

A classic lasagna recipe made with béchamel sauce instead of ricotta cheese. This will quickly become your favorite lasagna recipe and replace that tomato sauce-drenched version from the local mediocre Italian restaurant.

Lasagna No Ricotta

Smoked Salmon in Sour Cream-Horseradish Sauce

Horseradish, salmon, and dill add a freshness to this dip-like spread. Add a few slices of cucumbers for a refreshing crunch and this is the perfect light lunch or appetizer.

Smoked Salmon Spread

Salad Nicoise with a Twist

A salad nicoise that doesn’t follow any of the rules. Purple Peruvian potatoes, cherry tomatoes, and garlic scapes are added to make an amazing seasonal salad, exploding with flavor.

Salad Nicoise with a Twist

Stuffed Baked Apples with Homemade Caramel Sauce

Baked apples are taken to a whole new level with this crisp stuffed version. Oats, sugar, butter, and cinnamon are stuffed into a whole apple then baked and topped with homemade caramel sauce and vanilla ice cream. Excessiveness never tasted so good.

Stuffed Baked Apples with Caramel Sauce and Vanilla Ice Cream

Ginger Almond Sandwich Cookies

Lemon buttercream fills these spicy ginger almond sandwiches. A Paula Peck cookie favorite turned into irresistible sandwiches that will disappear as fast as you can make them.

Ginger Almond Sandwich Cookies


Happy New Year and hope to see you all in 2015.

Crunchy Homemade Pickles

Homemade Pickles

It’s been a little while since I’ve posted. Returning from my summer hiatus, it may seem strange that I selected a pickle recipe – but I absolutely love pickles. And apparently, I’m not the only one. They seem to be growing in popularity and I continue to see more and more specialty pickles at regular grocery stores. The basic dill and bread n butter pickles still remain the staples but now there are garlic dill, horseradish dill, spicy dill, half sour, and sour, just to name a few. There are also different and trendy, often hipster like brands that specialize in..well…specialty pickles. They are delicious but usually expensive, often charging $8-$9 for a small jar. This is why making homemade pickles seems so well worth it. Not only can you add and adjust the spices to your liking, but with just a few ingredients, you can make enough pickles for a year, at less than half the price.

I made quite a few modifications to this recipe, originally from “The Art of Good Cooking.” Most notably, I eliminated the whole cup of olive oil my grandmother instructed to use. I find that vinegar and water works perfectly fine and is both healthier and less expensive. I also added sprigs of dill and adjusted some of the spices. The actual process of making the pickles is very basic and despite what some may believe, no special canning equipment is needed. Just a big pot and canning jars are sufficient. The most important part of the process is salting and chilling the sliced cucumbers and onions. This seems to help ensure a crunchy pickle, which in my opinion, is the key to a good pickle. I’m not a fan of the soft ones, with little or no resistance when you bite into them. The crunchier, the better. A crisp crunchy pickle is a reminder of the fresh cucumber it was made from. That tasty tang from the brine and vinegar makes it the perfect add on to any end of summer barbecue dish – especially hamburgers!

Ingredients:

12 large kirby cucumbers (about 4 lbs)
1/2 cup coarse salt
4 onions, thinly sliced
whole garlic cloves (as many as you have jars)
fresh sprigs of dill (as many as you have jars)
bay leaves (as many as you have jars)
2 quarts cider vinegar
1 quart of water
1/4 cup sugar
2 tablespoons yellow mustard seeds
2 tablespoons black mustard seeds
2 tablespoons pickling spices
2 tablespoons celery seeds
4 quart jars or 8 pint jars, sterilized (see note)

In a large bowl, make alternate layers of sliced cucumbers, salt, and sliced onions. Let stand in refrigerator 5 hours. Rinse in ice water and drain well, pressing out as much liquid as possible. Return vegetables to bowl. Place a clove of garlic, a sprig of dill, and a bay leaf in each jar. Pack jars with vegetables.

Pour cider vinegar and water into a pot. Add sugar, mustard seeds, pickling spices, and celery seeds. Bring to a rolling boil. Pour mixture into each jar to cover vegetables. Cover tightly. Store in the refrigerator for two weeks or to make pickles shelf stable, place jars in a canner or pot of boiling water for 5-10 minutes or until the lid does not move up or down when pressed in the center.

Note: To sterilize jars and lids, simply boil them in a large pot of water for 5 minutes.

Adapted from “The Art of Good Cooking,” by Paula Peck.

Cucumbers and Onion for Pickles


Smoked Salmon in Sour Cream-Horseradish Sauce

Smoked Salmon Spread


Growing up in Minnesota, I wasn’t particularly familiar with smoked salmon or its popularity. My limited experience consisted of the bagels and Nova lox my father made a point to bring home every time we visited NYC. It was considered a treat when we had it (though I may have been more into the bagel and cream cheese at that time than the salmon). I had no idea that there were different kinds of smoked salmon and that it could be bought by the pound and on sandwiches at almost every New York deli.

The quality of smoked salmon varies – usually depending on price but also on the smoking method and/or curing method. Lower quality smoked salmon is usually saltier and somewhat mushier. I like Nova lox, which is technically a cold smoked salmon, but regular lox (which is just cured and not smoked), Scottish, or Norwegian smoked Salmon are also good depending on your preference. Whether you’re eating it on a sandwich or making a spread such as this, it’s important to use a smoked salmon you really like. Unlike most salmon spreads, the actual salmon flavor (and not just the saltiness) can be tasted in this dip-like spread. The horseradish, scallion, and dill complement the salmon and provide a freshness. No cooking, no fuss. Add a few slices of cucumbers for a refreshing crunch and this is the perfect light lunch or appetizer on a hot summer day.

Ingredients:

1/2 lb smoked salmon, shredded
1/2 cup finely chopped scallions
2 teaspoons fresh dill, chopped
3/4 cup sour cream
2 tablespoons horseradish
1 tablespoon mayonnaise
salt and pepper
1 teaspoon lemon juice (optional)
1 cucumber, thinly sliced (optional)

Add scallions and dill to smoked salmon.

In a separate bowl, combine sour cream, horseradish, and mayonnaise. Season with salt and pepper.

Add dressing to salmon mixture. Toss gently. Serve on thinly sliced rye or pumpernickel bread or multi-grain crackers layered with cucumbers (if using).

Adapted from “The Art of Good Cooking,” by Paula Peck.

Smoked Salmon Spread 2

Palmiers

Palmiers by Paula Peck

Sometimes I think my grandmother should have written a book called “101 things to do with puff pastry.” There are at least 20 recipes in “The Art of Find Baking” alone that use this buttery flaky dough. Also known as the elephant ear or palm tree, the classic French Palmier is more versatile than you may think. Instead of rolling the dough in just plain sugar, cinnamon sugar can be used for extra spice.  Also, by folding the dough into the more traditional palmier shape (versus the four-finger), these pastries look similar to a heart and are the perfect accompaniment for that morning cup of coffee on Valentines day.  It may be a bit of a stretch but if Parmesan cheese is used instead of sugar (a far less traditional ingredient), these turn into a delicious game day appetizer for the super bowl. Who knew these simple pastries had so many uses?

The key to a delicious palmier is to make them yourself and eat them fresh. Those sad boxed palmiers you see at the grocery store do not do them justice. Most of us don’t have time for the lengthy process of making puff pastry so store bought puff pastry may be used. As long as you bake them yourself, these snack-worthy pastries will be much better than the often stale, pre-made ones. Since rolling and folding the dough into the palmiers shape may seem daunting or even confusing, I have included the below illustration from “The Art of Fine Baking.” For those of you who are not familiar with this baking book, it’s full of these charming old fashioned illustrations and this one in particular is actually quite helpful. So the next time you have extra puff pastry or are looking for a fun, easy snack – give palmiers a chance. You may be surprised how much you like them.

Ingredients:

Puff Pastry recipe
granulated sugar, cinnamon sugar, or grated Parmesan cheese

Roll out puff pastry in sugar to make a long strip ten inches wide and 1/8 inch thick (if using cheese instead of sugar, roll out pastry in flour). Sprinkle with sugar (or cheese). Determine the center of the strip. Fold each long side inward into thirds, so that two folded halves meet exactly in the center. Then fold halves together to make a compact 6-layer roll. Coat with additional sugar or cheese. Wrap in wax paper and chill for 1 hour.

Palmiers Folding Instructions

Preheat oven to 350 degrees. Cut roll into 1/4 inch slices. Place well apart on ungreased baking sheet. Spread the two halves of each slice slightly so they can expand while baking. Bake about 30 minutes, turning slices over once with a spatula after 25 minutes. Bake until golden brown.