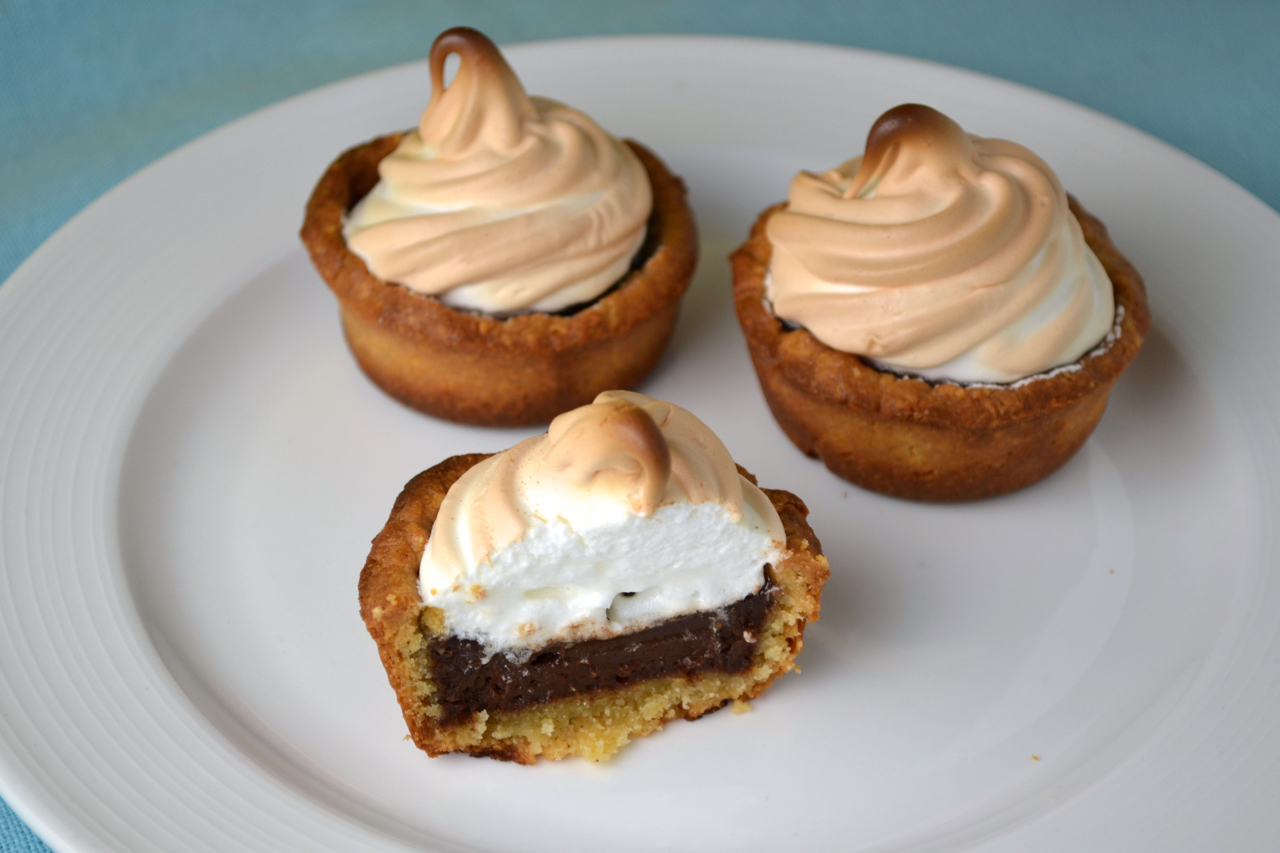
Mini Chocolate Almond Meringue Tarts

Mini Chocolate Meringue TartsI know this may seem like an odd selection for a recipe post just a few days before Christmas. It’s not holiday specific and it doesn’t contain peppermint, molasses or ginger, or any other Christmasy baking ingredient that is usually expected this time of year. What you have here is a tasty little party dessert that covers all your festive baking bases. Almond paste is the dominant flavor in the crust, which then accents the rich chocolate ganache filling. But lets not forget the meringue. These lovely white peaks are the finishing touch that brings all of the components together into one delicious mini dessert.

I developed this recipe solely based on inspiration. It is not a Paula Peck recipe nor one from her colleagues. I happen to try a version of these little delights at an Italian Bakery in New Jersey that I often frequent. A chocolate tart with an almond flavored crust seemed brilliant to me and I’m always a sucker for meringue. I had seen the recipe for Almond Short Pastry in my grandmother’s book , “The Art of Fine Baking,” and the use of both ground almonds and almond paste convinced me it would make the perfect tart dough. The richness of the hard cooked egg yolks (one of her best tart-making techniques) combined with the nutty almond pairs beautifully with the chocolate filling. The meringue may be over kill but it definitely gives these tartlets the snowy-peak feel appropriate for holiday entertaining. Besides, who can resist the pillowy white marshmallow texture on top of almond chocolaty morsels of magic?

Ingredients:

Almond Short Pastry
1/2 cup almond paste
3 egg yolks
2/3 cup unbalanced almonds
1 1/4 cups all purpose flour, sifted
1/3 cup sugar
1/2 teaspoon salt
1 teaspoon lemon zest
1/2 cup butter
pinch cloves
1/4 teaspoon cinnamon
2 hard boiled egg yolks, pushed through a sieve

Chocolate Ganache
1 cup heavy cream
1/2 cup whole milk
1-12 ounce bag of semi sweet chocolate chips
2 tablespoons sugar
1/4 teaspoon salt
2 large eggs

Meringue
4 large egg whites
1 cup sugar
1/4 teaspoon cream of tartar
1 teaspoon vanilla extract

Lightly grease a muffin pan.

Cream almond paste with raw egg yolks until soft. Place almonds in a food processor and pulse until finely ground.

Mix flour and ground almonds together and place in a bowl, making a well in the center. In the well, place sugar, salt, lemon zest, softened butter, spices, hard boiled egg yolk, and almond-paste mixture.

With finger tips, combine the center ingredients, gradually incorporating flour and nuts to make a smooth, firm ball of dough. Chill until firm enough to roll between sheets of wax paper (about 1 hour).

Roll out dough 1/4 inch thick. Using a 3 inch round cookie cutter or top of a glass, cut out rounds of dough and gently place them in muffin tin, lightly pressing down to line each cup. Chill for 30 minutes. Meanwhile preheat oven to 350 degrees.

Bake 15-20 minutes or until just barely beginning to lightly brown. Half way through baking, prick centers of cups so they do not continue to puff up. Allow to fully cool.

While tarts cool, make the ganache filling:

Heat the heavy cream and milk in a pot over medium-low until it simmering slightly. Remove from the heat; add the chocolate and stir until melted and smooth. Add the sugar and salt and whisk until well incorporated. Beat the eggs and add them to the chocolate mixture, stir until completely combined. Pour the filling into the cooled tartlets and bake at 325 degrees for 15 minutes until the filling is set and the surface is glossy. Cool completely.

While tartlets cool, make the meringue topping:

Place egg whites, sugar, and cream of tartar in the heatproof bowl. Set over a saucepan with simmering water. Whisk constantly until sugar is dissolved and whites are warm to the touch.
Transfer bowl to electric mixer fitted with the whisk attachment. Beat, starting on low speed, gradually increasing to high, until stiff, glossy peaks form, 5 to 7 minutes. Add vanilla, and mix until combined.

Pipe mixture onto tartlets. Raise oven heat to 350 and place tartlets in oven, until meringue is golden (about 5-10 minutes). Cool.

Yield about 12 mini tarts.

Mini Chocolate Ganache Meringue Tarts


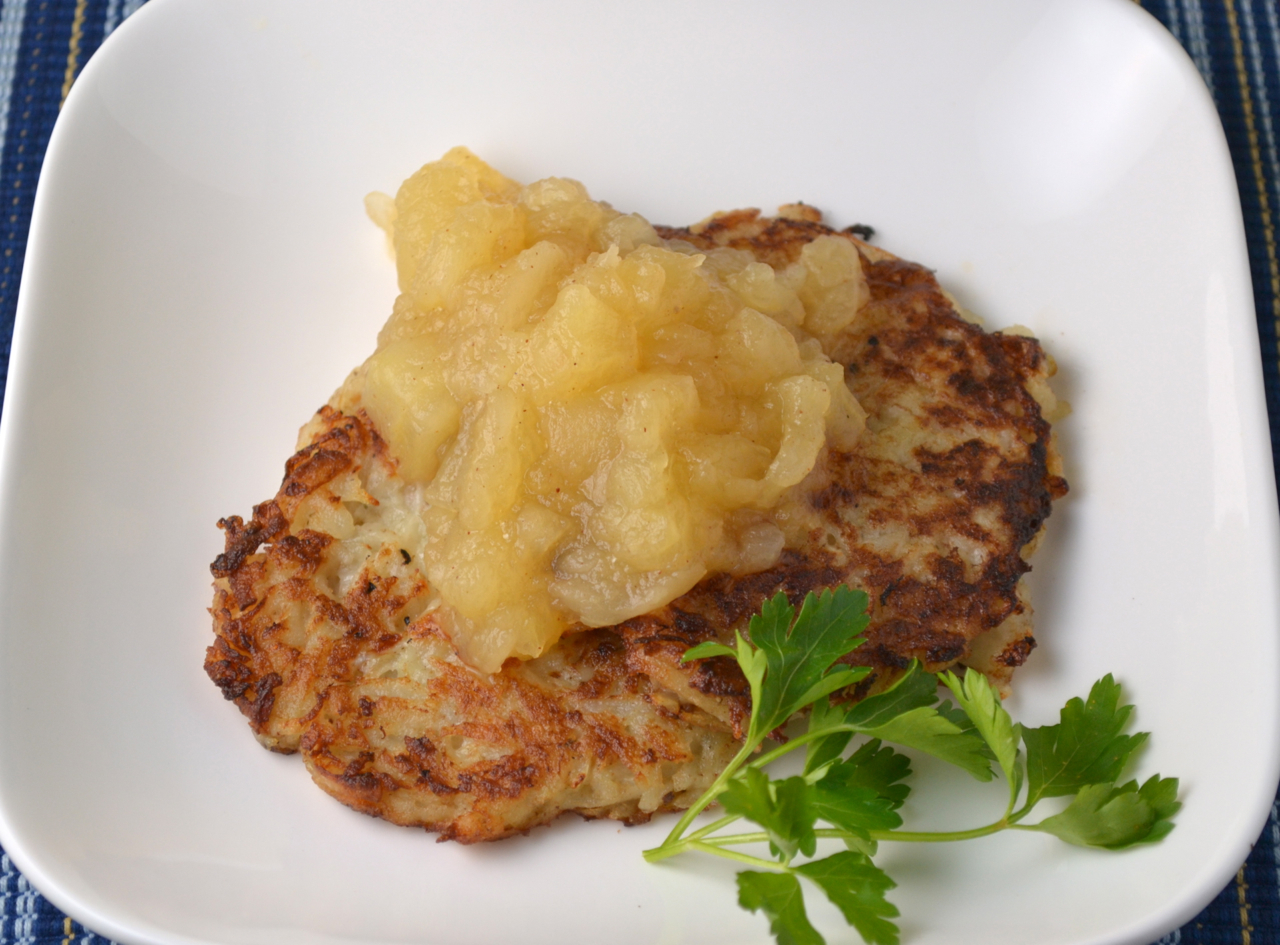
Potato Pancakes with Honey Crisp Apple Sauce

Potato Pancakes with Apple Sauce

Before you discard this post because you don’t celebrate Hanukkah or understand why potato pancakes/latkes are so tasty, let me assure you that you don’t have to be religious to enjoy this simple (and vegetarian) side dish. I have an affinity for the sweet and savory combination of shredded potato and onion with cinnamon apple sauce. This may have started when I was was a child, with our attempts to celebrate Hanukkah by re-creating this traditional dish. It’s beyond that now. These pancakes actually follow the basic no-fail culinary combination of sweet, salt, fat, and acid – practically guaranteeing its tastiness.

This basic recipe was adapted from “The James Beard Cookbook,” by James Beard. It’s strange that James Beard published a potato pancake recipe but my grandmother did not. With her Jewish background, it seems only natural that she would have a recipe for such a common dish. But it appears she made Spinach Pancakes more frequently than potato pancakes (based on “The Art of Good Cooking”). Nonetheless, this is a great base recipe, and paired with my homemade Honeycrisp apple sauce, it’s even better. Simply grate potato and onion into a strainer and squeeze out some of the liquid. This is then mixed with egg, a small amount of bread crumbs, and salt. Saute in butter (or blended butter and oil) and you have a crispy pancake that includes the salt and fat required for the dish.

The apple sauce makes up the acid and sweet components of the culinary combo. Just boil honey crisp apples (I like the juiciness and sweet honey flavor of honey crisps) in a little water with a tablespoon of honey, a tablespoon of sugar, and a touch cinnamon. Finish with lemon juice (for the acid and to help keep the color). You will have a delicious apple sauce and as you can see here, I almost prefer equal parts apple sauce and pancake. Each bite should have a good amount of both. Sour cream can also be added but I’ve never found it necessary. Whether you celebrate Hanukkah or not, these potato pancakes with sweet homemade apple sauce make a satisfying lunch or snack.

Ingredients:

4 medium potatoes
1 1/2 medium onions
1 egg
2 tablespoons dry bread crumbs
1 teaspoon salt
1/2 teaspoon ground pepper
Butter

Honey Crisp Apple Sauce
6 honey crisp apples
1 cup water
1 tablespoon honey
1 tablespoon granulated sugar
1/4 teaspoon ground cinnamon
2 tablespoons lemon juice

Wash and peel the potatoes. Grate with a grater and drain off all the liquid that collects in the bowl. Grate the onion into the potato and mix in the egg, breadcrumbs, salt, and pepper. Heat two tablespoons of butter in a large skillet. Put in four large spoonfuls of the mixture. Pat down slightly to create pancakes, about 2 inches wide. Cook gently until brown on the bottom, turn, and brown on the other side. Add more fat and continue cooking until all of the mixture is used.

To make the Honey Crisp Apple Sauce:

Peel and core the apples. Halve lemon and rub on apple halves to prevent browning. Dice apples. Place apples in a large pot with 1 cup water. Bring to a boil. Stir in honey and sugar. Simmer for 30 minutes or until apples are soft and create a sauce. Stir in cinnamon and lemon juice.

Serve pancakes with large spoonfuls of apple sauce.

Serves 5-6.

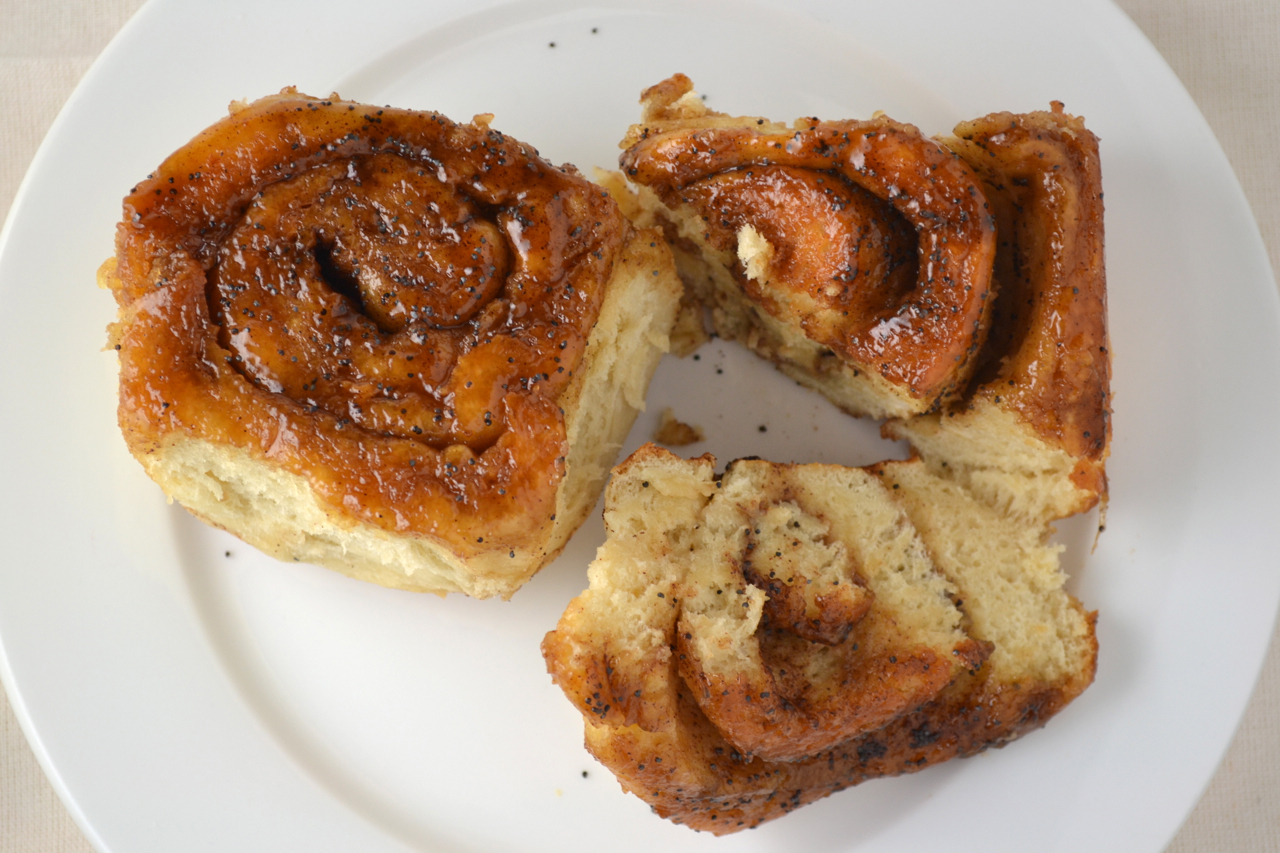
Poppy Seed Caramel Rolls

Cinnamon Rolls

Cinnamon and caramel rolls seem to be everywhere these days, or at least photos of them are. The gooey texture is both photogenic and irresistible. I often see these well-known breakfast rolls prominently displayed on large white plates or cake stands at cafés around New York City. I almost always have to buy one. A version of my own was long overdue yet perfectly timed with the Holidays.

The base of this recipe came from the “The James Beard Cookbook,” by James Beard but the inspiration came from two very different sources: a nostalgic Christmas memory and a popular babka bakery in New York City. Growing up in a cozy Minneapolis neighborhood, our neighbors exchanged small gifts (usually of homemade goodies) every Christmas. My family looked forward to the plate of Caramel Rolls that was routinely included in these gifts every year. Each roll was always the perfect size, not too big nor too small, with just the right amount of caramel. We would save them for breakfast on Christmas morning.

The addition of poppy seeds to this nostalgic replication was inspired by Breads Bakery, one of my favorite bakeries in New York City. They are known for many delicious breads and pastries but their chocolate Babka is particularly impressive (they even ship it nationwide!). The deep chocolate swirls remind me of black poppy seeds and inspired me to combine them into this indulgent sweet bready treat.

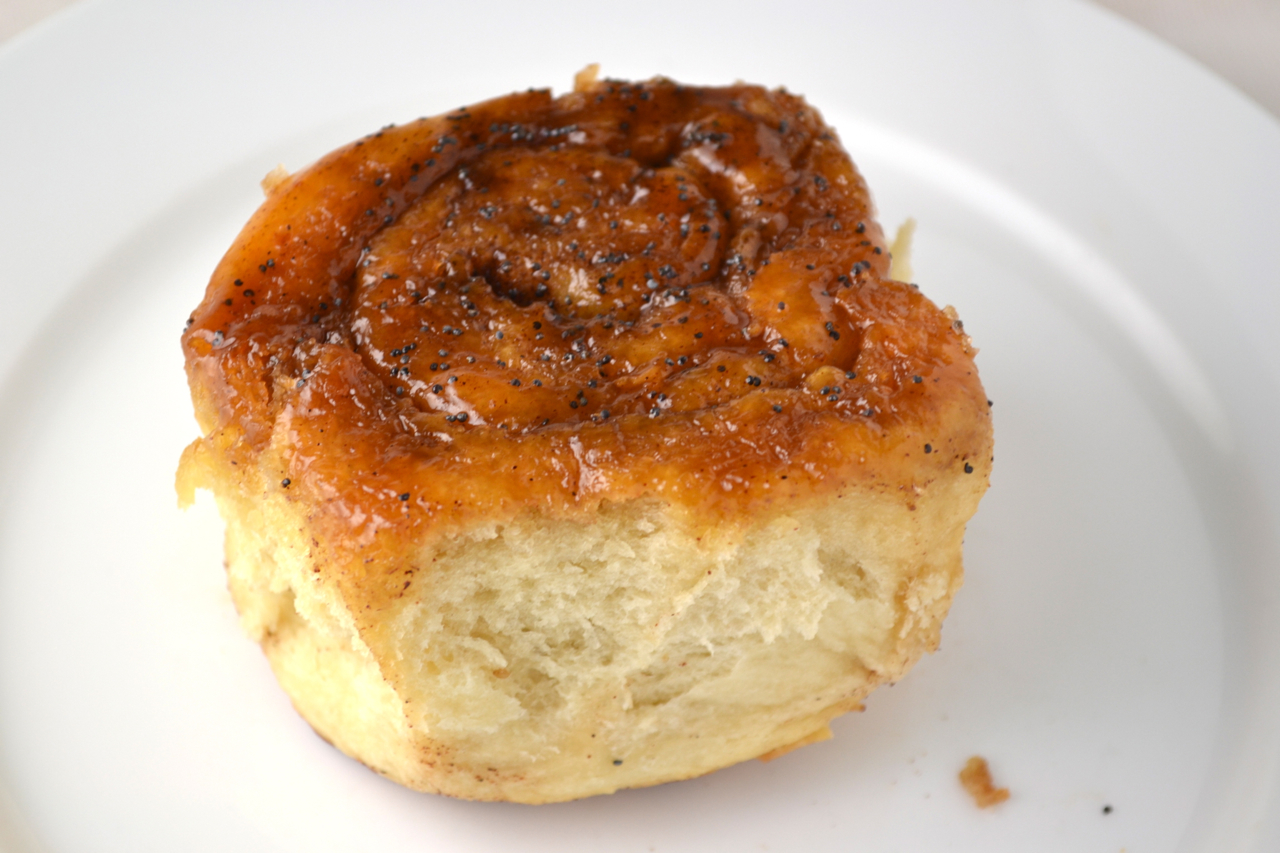
These delectable rolls can also be made plain, without poppy seeds, for a classic version. However, those of us who love poppy seeds, will enjoy the light crunch and texture that the spattering of poppy seeds provides. These caramel rolls may be different from those that I looked forward to every Christmas as a child, but they are better than what I find at most cafes here in the city. They just might make it on the table with the holiday desserts this year (as well as for breakfast, of course).

Ingredients:

2 (1 1/2 tablespoons) packages active dry yeast
2 cups lukewarm milk
1 tablespoons sugar
1 tablespoon honey
4 tablespoons unsalted butter
1 tablespoon salt
5-6 cups all-purpose flour
4 tablespoons soft unsalted butter
3/4 cup light brown sugar
1 1/2 teaspoons cinnamon
1 1/2 teaspoons poppy seeds

Topping
4 tablespoons + 1 tablespoon unsalted butter
3/4 brown sugar
cinnamon and poppy seeds for sprinkling

Mix the yeast in a large bowl with ½ cup of the warm milk, honey, and sugar. Let stand a few minutes to proof. Melt butter in remaining milk and add the salt. Combine with the yeast mixture.

Add the flour a cup at a time and stir it in with a wooden spoon. Continue mixing until dough is thoroughly blended. If you are using an electric mixer with a dough hook, knead at slow speed for 3-4 minutes, adding more flour as necessary, until dough is smooth and pulls away from the sides of the bowl. If kneading by hand, turn out dough onto a floured surface and knead until dough is very soft, smooth, and elastic. Transfer to a well-buttered bowl and allow to rise in a warm spot until double in bulk (around 1-2 hours).

While dough rises, grease bottom and sides of a 9 inch round cake pan or 8 inch square baking pan. Mix Melt 4 tablespoons of melted butter with ¾ cup brown sugar. Pour into prepared pan.

Punch down dough and turn out on a lightly floured surface. Roll out with a rolling pin into a rectangle, about ½ inch thick. Spread with softened butter, brown sugar, cinnamon, and poppy seeds.  Roll up and cut the roll into 1 – 1 ½ inch slices. Arrange slices in the prepared pan.  Cover and let rise 30 minutes.

Preheat oven to 425 degrees. Melt tablespoon. Brush the rolls with the butter and sprinkle with poppy seeds and cinnamon. Bake 15 minutes or until golden brown. Allow to cool slightly then run a butter knife along the sides of the pan to release the rolls. Place a serving plate on top of the rolls and while holding the bottom of the baking pan, flip upside down onto the serving plate so that the bottoms of the rolls are facing up and the caramel sauce covers them.

Yield 9 large rolls or 18 small rolls.

Poppy Seed Cinnamon Roll


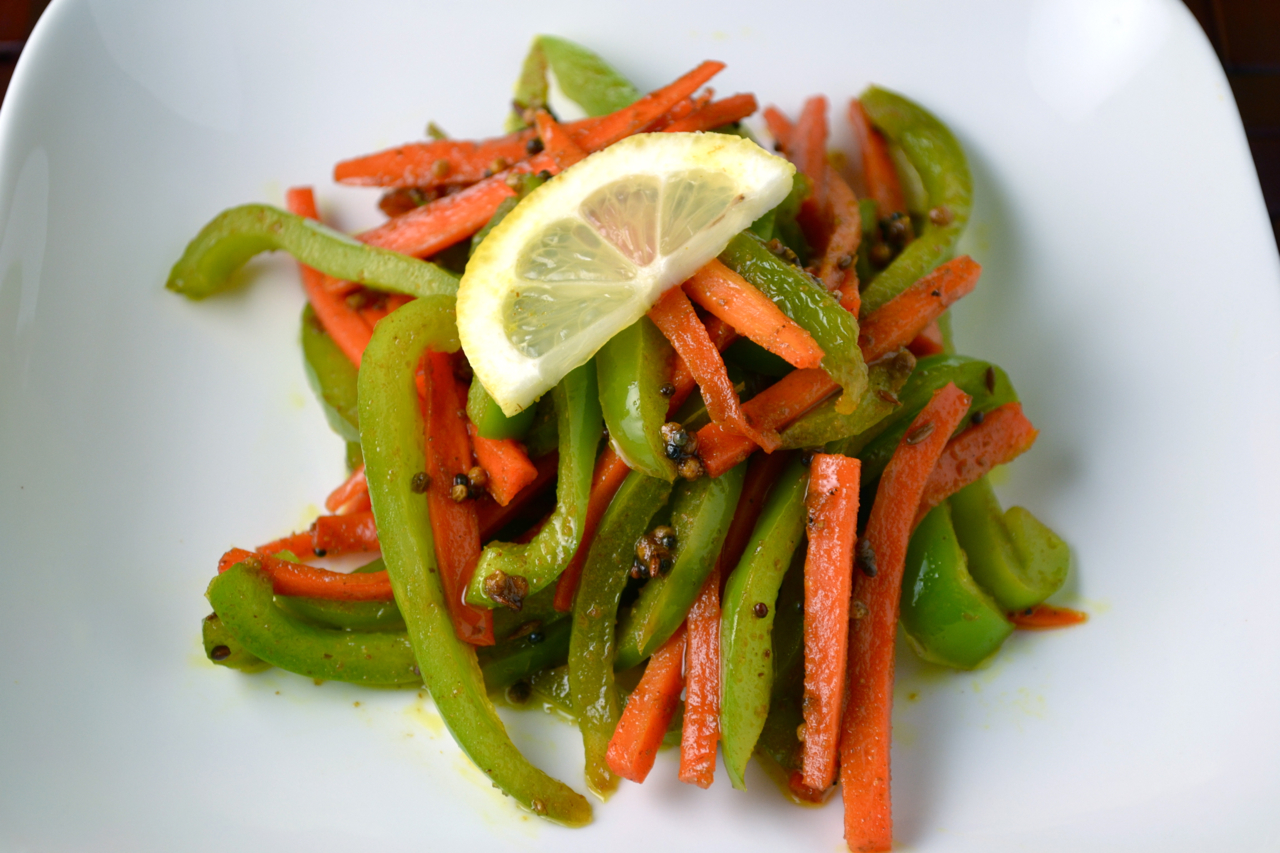
Curried Carrots and Peppers

Curried Carrots and PepperIndian food is often my go to comfort food. When the warm intense spices fill the kitchen with the scents of cumin, coriander, and mustard seeds, I feel at home. I also don’t feel guilty after eating a big meal because most of what I make from this unique spicy cuisine, is healthy (unlike other comfort foods like mac and cheese and mashed potatoes that I also adore). Indian food isn’t usually considered diet friendly because Indian restaurants often use a lot of oil and cream. And the Samosa, arguably the most popular Indian dish/appetizer, is basically potatoes and vegetables fried in dough. But since the traditional spices are strong and flavorful, it’s easy to make tasty Indian dishes with very little fat – especially vegetables. This recipe for carrots and peppers uses just a little oil, spices, lemon juice, and touch of sugar. It makes a flavorful side dish (or main dish if you are full from all of that holiday food).

Surprisingly, this recipe is from “The Art of Good Cooking.” It continues to amaze me how my grandmother managed to replicate and publish such ethnic recipes over 50 years ago, when so many side dishes still came from a can. Living in Harlem, she was surrounded by diversity and learned many of these recipes from friends or neighbors. This dish, titled “Oza’s Carrots and Peppers” in her book, is an example of that influence. An obvious question is, who’s Oza? The introduction to the recipe mentions that Oza was an Indian friend and neighbor. Not long ago, I heard from Oza’s son. He mentioned that Oza, now 92, still has fond memories of my grandmother and grandfather.

The only modifications I made to the original recipe is the amount of oil and curry powder (I believe curry powder was less potent in the 1960’s). I also prefer to make my own curry powder by using a combination of ground coriander, cumin, and turmeric (proportions below). The original recipe already had the fat, acid, and sweet components to make it the perfect party for your taste buds. As we fatten our bellies with baked goods and rich foods this holiday season, these spiced vegetables can provide a nice break for your body but still provide the comfort of the holiday season.

Ingredients:

1/3 cup peanut oil
2 teaspoons brown or yellow mustard seeds
2 teaspoons cumin seeds
2 teaspoons curry powder (or 1 teaspoon each ground cumin and ground coriander, 1/2 teaspoon turmeric)
1/4 teaspoon cayenne pepper
3 carrots, thinly sliced
3 green bell peppers, thinly sliced
2 tablespoons brown sugar
Salt and Pepper
Juice of 1 lemon

In a deep saucepan, heat peanut oil until almost smoking. Add mustard seeds. Turn heat down and add cumin seeds, curry powder, and cayenne. Cook 2 minutes. Add sliced carrots and green peppers and stir into the spices. Cook until vegetables begin to change color but are still crisp. Stir in brown sugar, salt, and pepper to taste. Remove from heat and add lemon juice.

Serves 4


Ginger Almond Sandwich Cookies

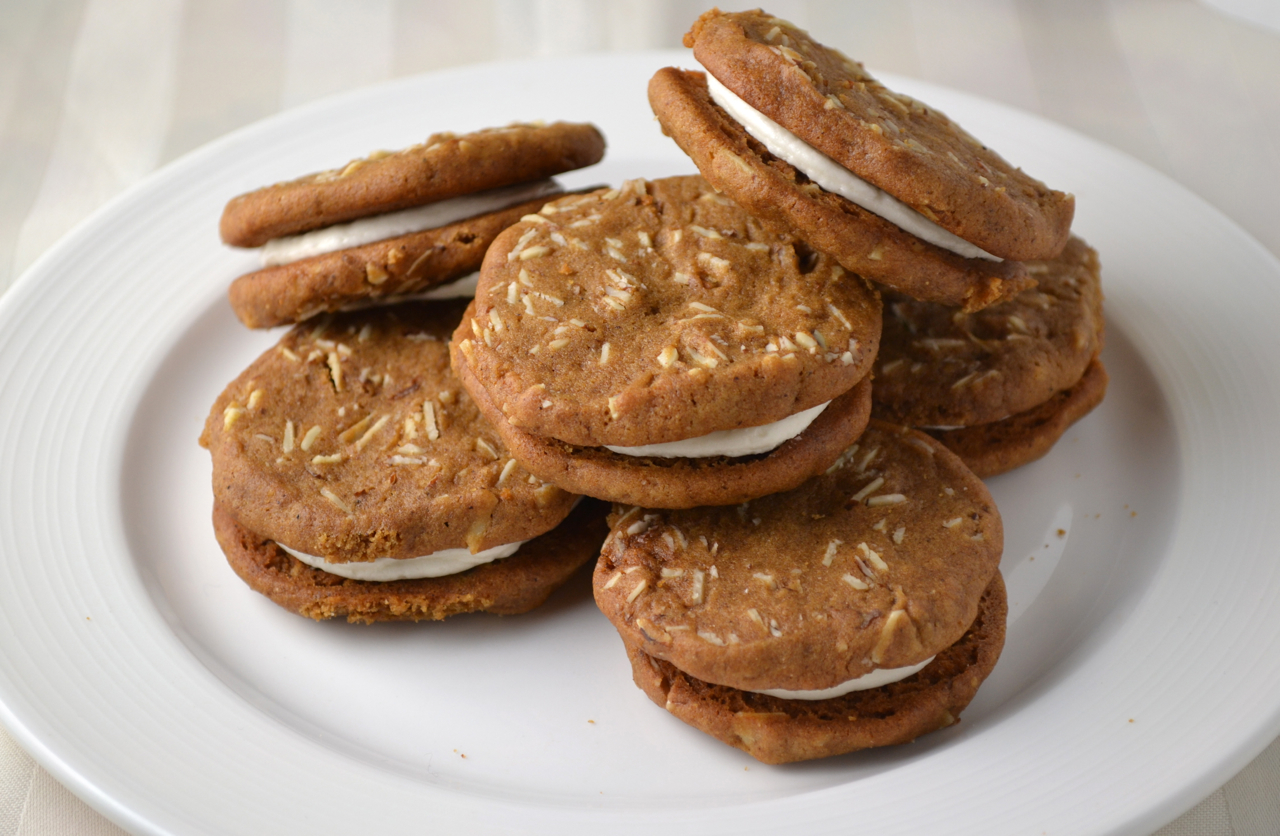
Ginger Almond Sandwich Cookies

There is no shortage of cookie recipes this time of year. Everyone seems to have a favorite type of cookie or baking tradition that they don’t normally stray from during the holidays. I am no different. I have few really good cookie recipes that I repeat for special occasions. A recipe has to be both special and scrumptious to make it into that repeat category. But this year, I used a familiar good cookie recipe and promoted it to an amazing one by creating these sandwich cookies. These are delicious cookies. Seriously. After taking just one bite, a friend commented “you should sell these,” and he doesn’t even like dessert.

Ginger is an obvious go to flavor this time of year and I’ve been making these tasty almond cookies from “The Art of Fine Baking” for a few holidays now. I even shared the popular recipe in culinary school when we were required to make a gourmet buffet of sorts. Molasses, cinnamon, cloves, and ground ginger provide these buttery cookies with a rich spicy kick. Sliced almonds add a tender crunch to the soft (but not gooey or crumbly) finished cookies. Since the dough (if you don’t eat most of it first) is formed into a log, chilled, and then sliced into even symmetrical rounds, these are easy candidates for sandwiches. Lemony butter cream was the logical choice to help balance the strong spices that accent the deep molasses flavor. Piping this sweet cream onto the cookies proved surprisingly quick. I had to stop myself from eating each cookie sandwich as I made them.

It’s easy to fall back into the same habits and bake the same desserts every holiday season but without trying anything different, you may never establish your next favorite baking tradition. This is the lesson I’m learning…as I gobble down another gingery lemon scented sandwich cookie.

Ingredients:

1 cup unsalted butter, softened
1 cup sugar
1 egg
1/2 cup molasses
1 tablespoon ground ginger
1 teaspoon ground cinnamon
1/2 teaspoon ground cloves
1 teaspoon baking soda
2 cups sliced almonds
3 1/4 cups all purpose flour

Lemon Buttercream
6 tablespoons unsalted butter, softened
1 1/2 cups confectioners sugar
1/4 teaspoon lemon zest
1 1/2 tablespoons lemon juice
1 tablespoon vanilla extract

Cream butter and sugar. Add egg, molasses, spices, baking soda, and almonds. Mix in flour. Form dough into two logs about 1 1/2 inches in diameter. Chill for 1 hour.

Preheat oven to 350 degrees. Lightly grease or line baking sheets with parchment paper. Slice dough logs 1/4 inch thick and place slices on prepared baking sheets about 1 inch apart. Bake 8-10 minutes or until just lightly browned.

While cookies cool, make the lemon cream:

Beat butter with sugar in an electric mixer until light and fluffy. Mix in zest, lemon juice, and vanilla.

When cookies are cool, fill a piping bag with lemon cream and pipe an even layer of cream on half the cookies. Top each cream filled cookie with a plain one to create sandwiches.

Yield approximately 30

Pumpkin Cake Roll

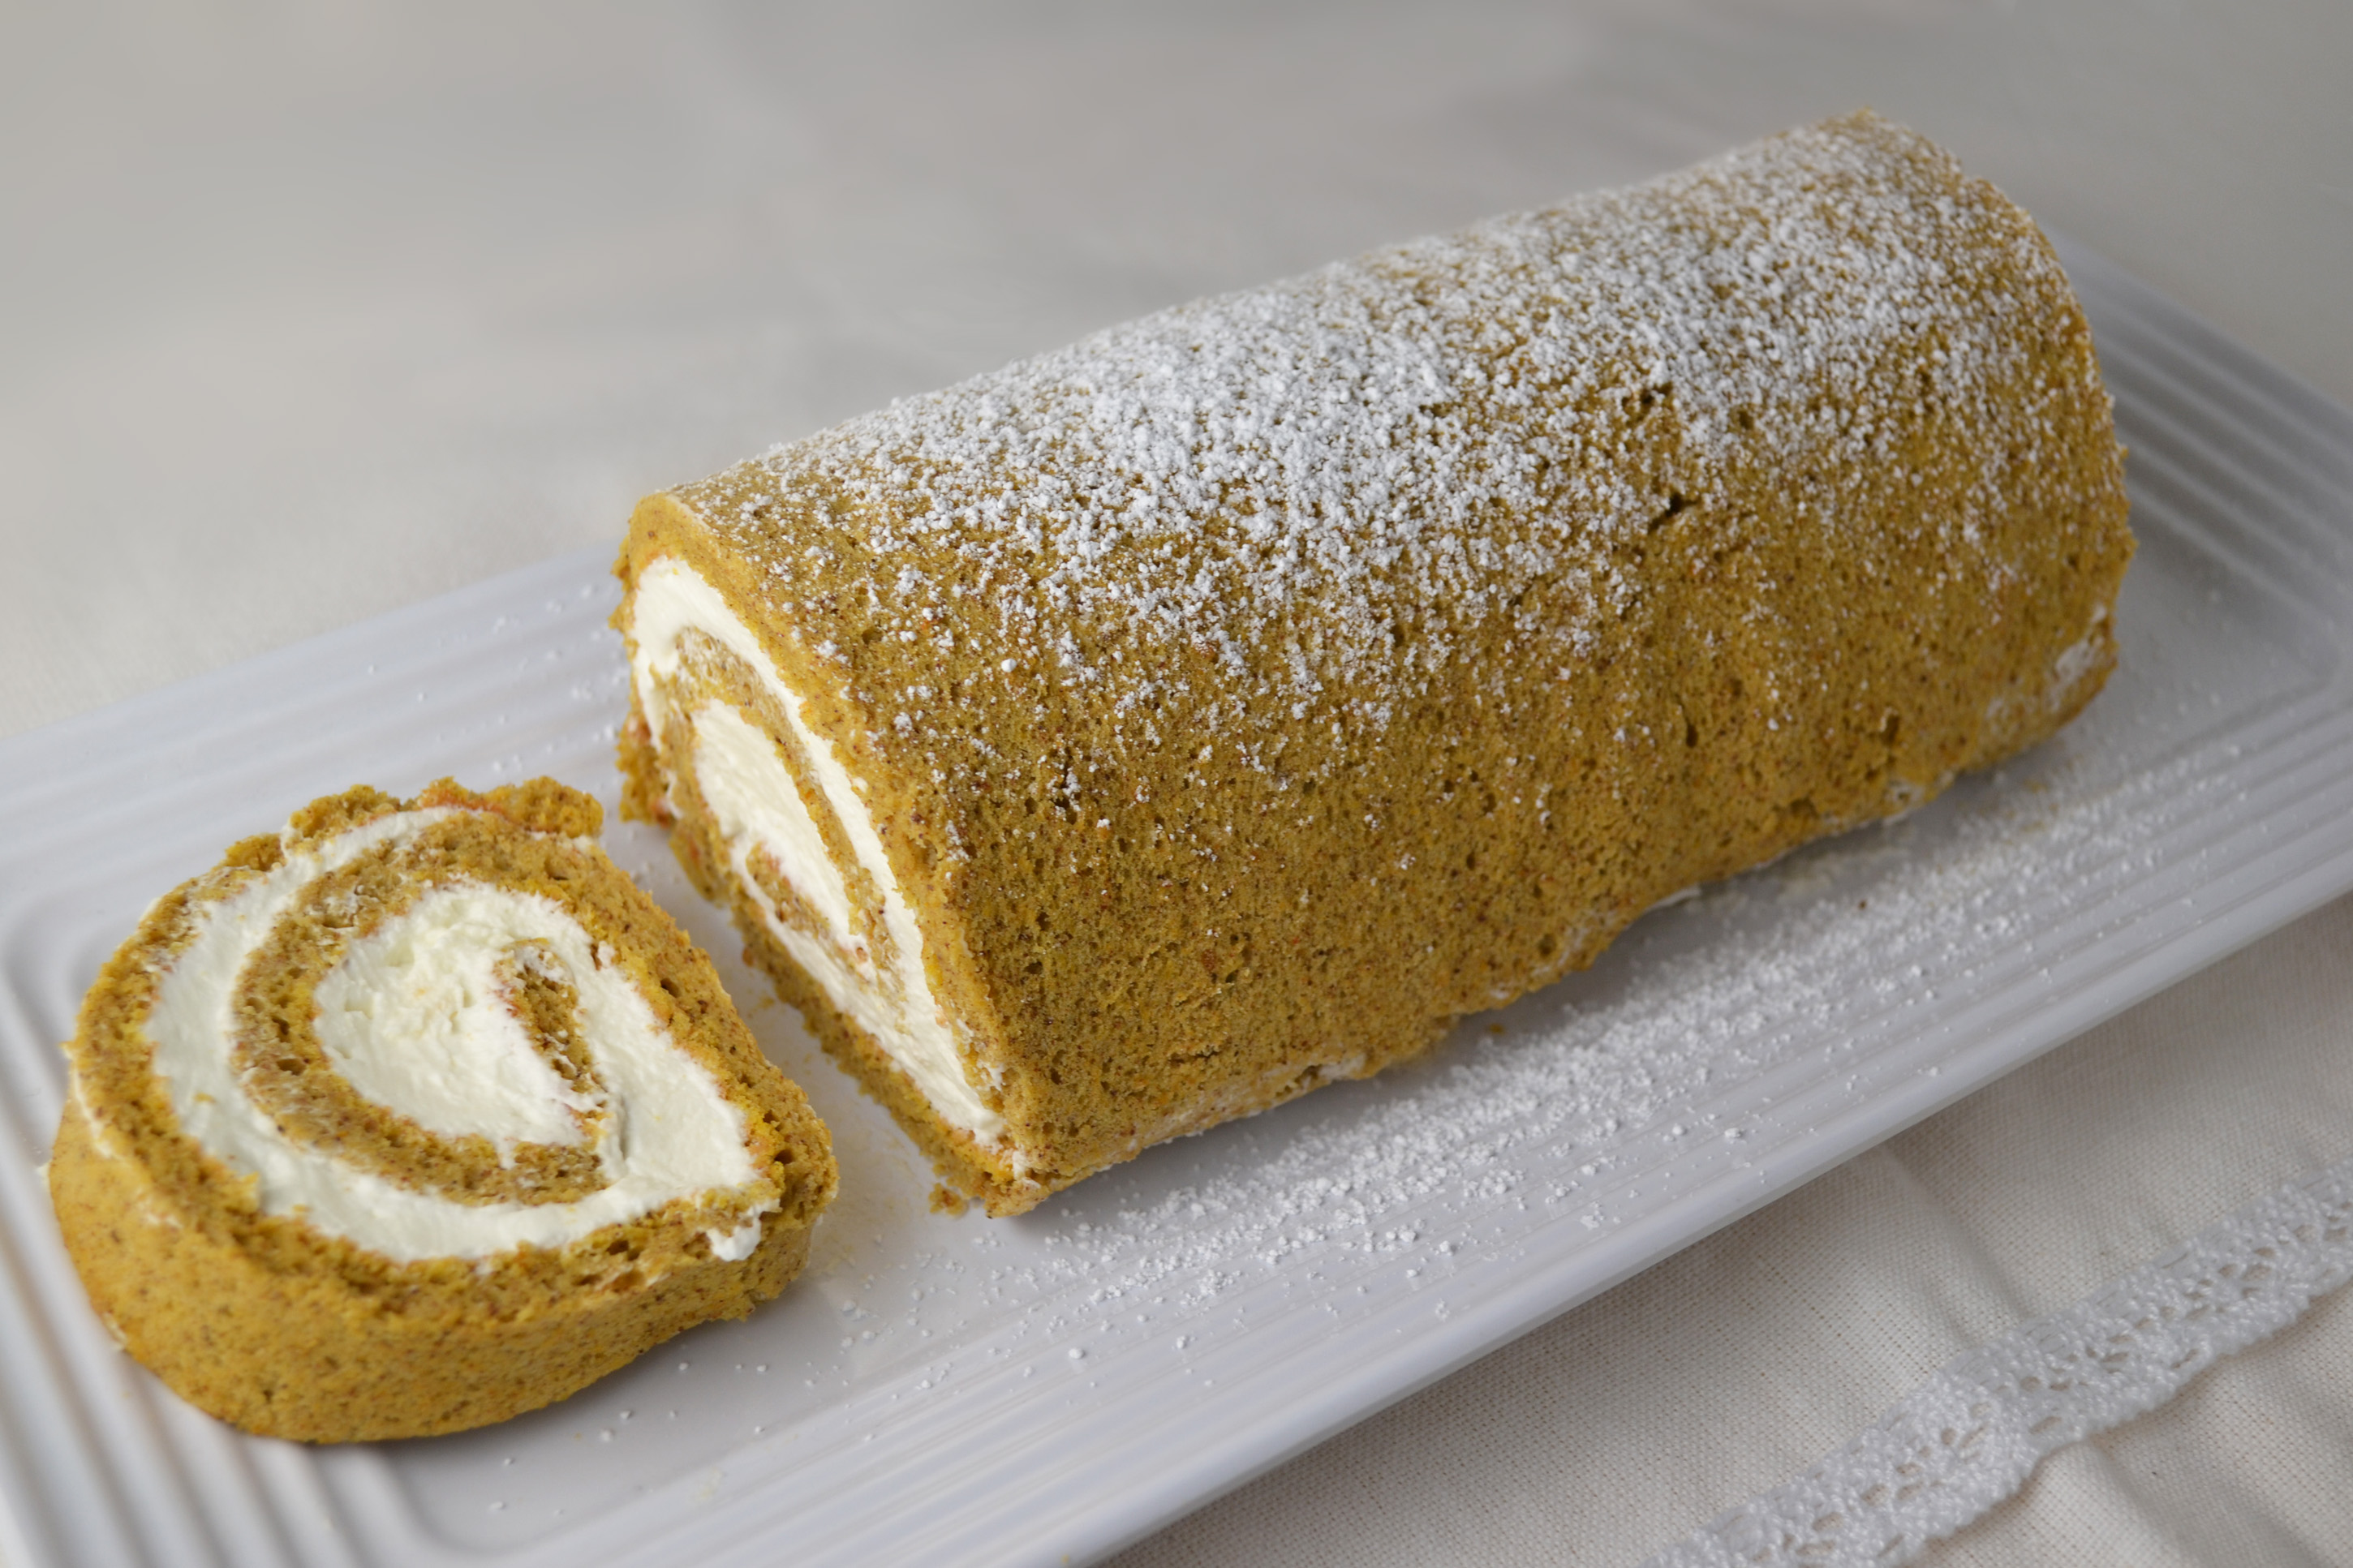
Pumpkin Cake Roll We can’t seem to get enough pumpkin these days. From pumpkin spice Oreos to pumpkin spice latte burgers (yes, really), there’s more and more of this popular flavor combination every year. And why not? The pairing of this seasonal squash with sugar and comforting cloves, cinnamon, and nutmeg can be almost addictive. This is also why many classic recipes are so easily adaptable to a pumpkin spice version. Although Pumpkin may not have been a common ingredient at the height of my grandmother’s career, the spice mix was. My grandmother used these spices in her simple spiced sponge cake recipe, which I used as a base for this pumpkin cake roll.

I often wonder what my grandmother would think of this pumpkin explosion. I’m sure she would have first perfected pumpkin pie and then possibly expanded to pumpkin cookies or bread. She may have stopped at that point or continued on a quest to master the best of the pumpkin recipes. This type of cake roll would have been somewhat abstract for her but I was inspired by the pumpkin craze and decided to merge her chocolate roll/yule log recipe with her spiced sponge cake one. The light whipped mascarpone cream is what differentiates this from other cake roll recipes that often use cream cheese frosting. I have nothing against cream cheese frosting (love it on carrot cake) but those of us who are somehow offended by it may prefer this light whipped cream to help balance the spice of the cake. The rich buttery taste remains but without the sourness often experienced with cream cheese. If you’re not tired of pumpkin yet but don’t want to stray too far from the classic pumpkin desserts, a cake roll could be the sweet finish to end your Thanksgiving meal.

Ingredients:

Cake
4 eggs
pinch salt
1/2 cup + 2 tbs sugar
1/2 cup pumpkin purée
1/2 teaspoon vanilla extract
1/4 cup sifted corn starch
3/4 cup sifted all purpose flour
1 teaspoon ground cinnamon
1/2 teaspoon ground cloves
1/2 teaspoon ground nutmeg

Mascarpone Whipped Cream
1 cup heavy whipping cream
3-4 tablespoons powdered sugar
3 tablespoons mascarpone cheese
1 teaspoon vanilla extract

Preheat oven to 400 degrees. Grease an 11 x 16 jelly roll pan or a 9 x 13 pan and line with parchment paper.

Separate eggs. Beat egg whites with salt until they hold soft peaks. Gradually beat in sugar, sprinkling it in a little at a time. Continue beating until whites are very firm, about 5 minutes in all.

Stir yolks with a fork to break them up. Whisk in pumpkin. Add vanilla. Fold a quarter of the stiffly beaten egg whites thoroughly into egg yolks. Pour egg yolk mixture on top of remaining whites. Sprinkle corn starch, flour, and spices over mixture. Fold all very gently together until no pieces of egg white show. Careful not to over mix.

Pour into prepared pan, spreading batter evenly. Bake 10-12 minutes or until cake is very lightly browned.

While cake sheet cools, make the whipped cream:

Beat heavy cream until soft peaks form. Add vanilla and 1 tablespoon powdered sugar. Continue beating, gradually adding remaining sugar, until the cream holds stiff peaks. Carefully bear in mascarpone cheese until just combined.

To assemble the cake roll:

Place cake on a sheet of wax paper large enough to extend at least 1 inch on all sides and dusted with powdered sugar or a little flour. Spread cake with whipped cream. Lifting one long side of the wax paper, roll pastry inward. Continue to lift wax paper while pastry rolls up, jelly-roll style. Twist wax paper firmly around cake roll to help give it shape. Dust with powdered sugar.


Mizutaki Soup

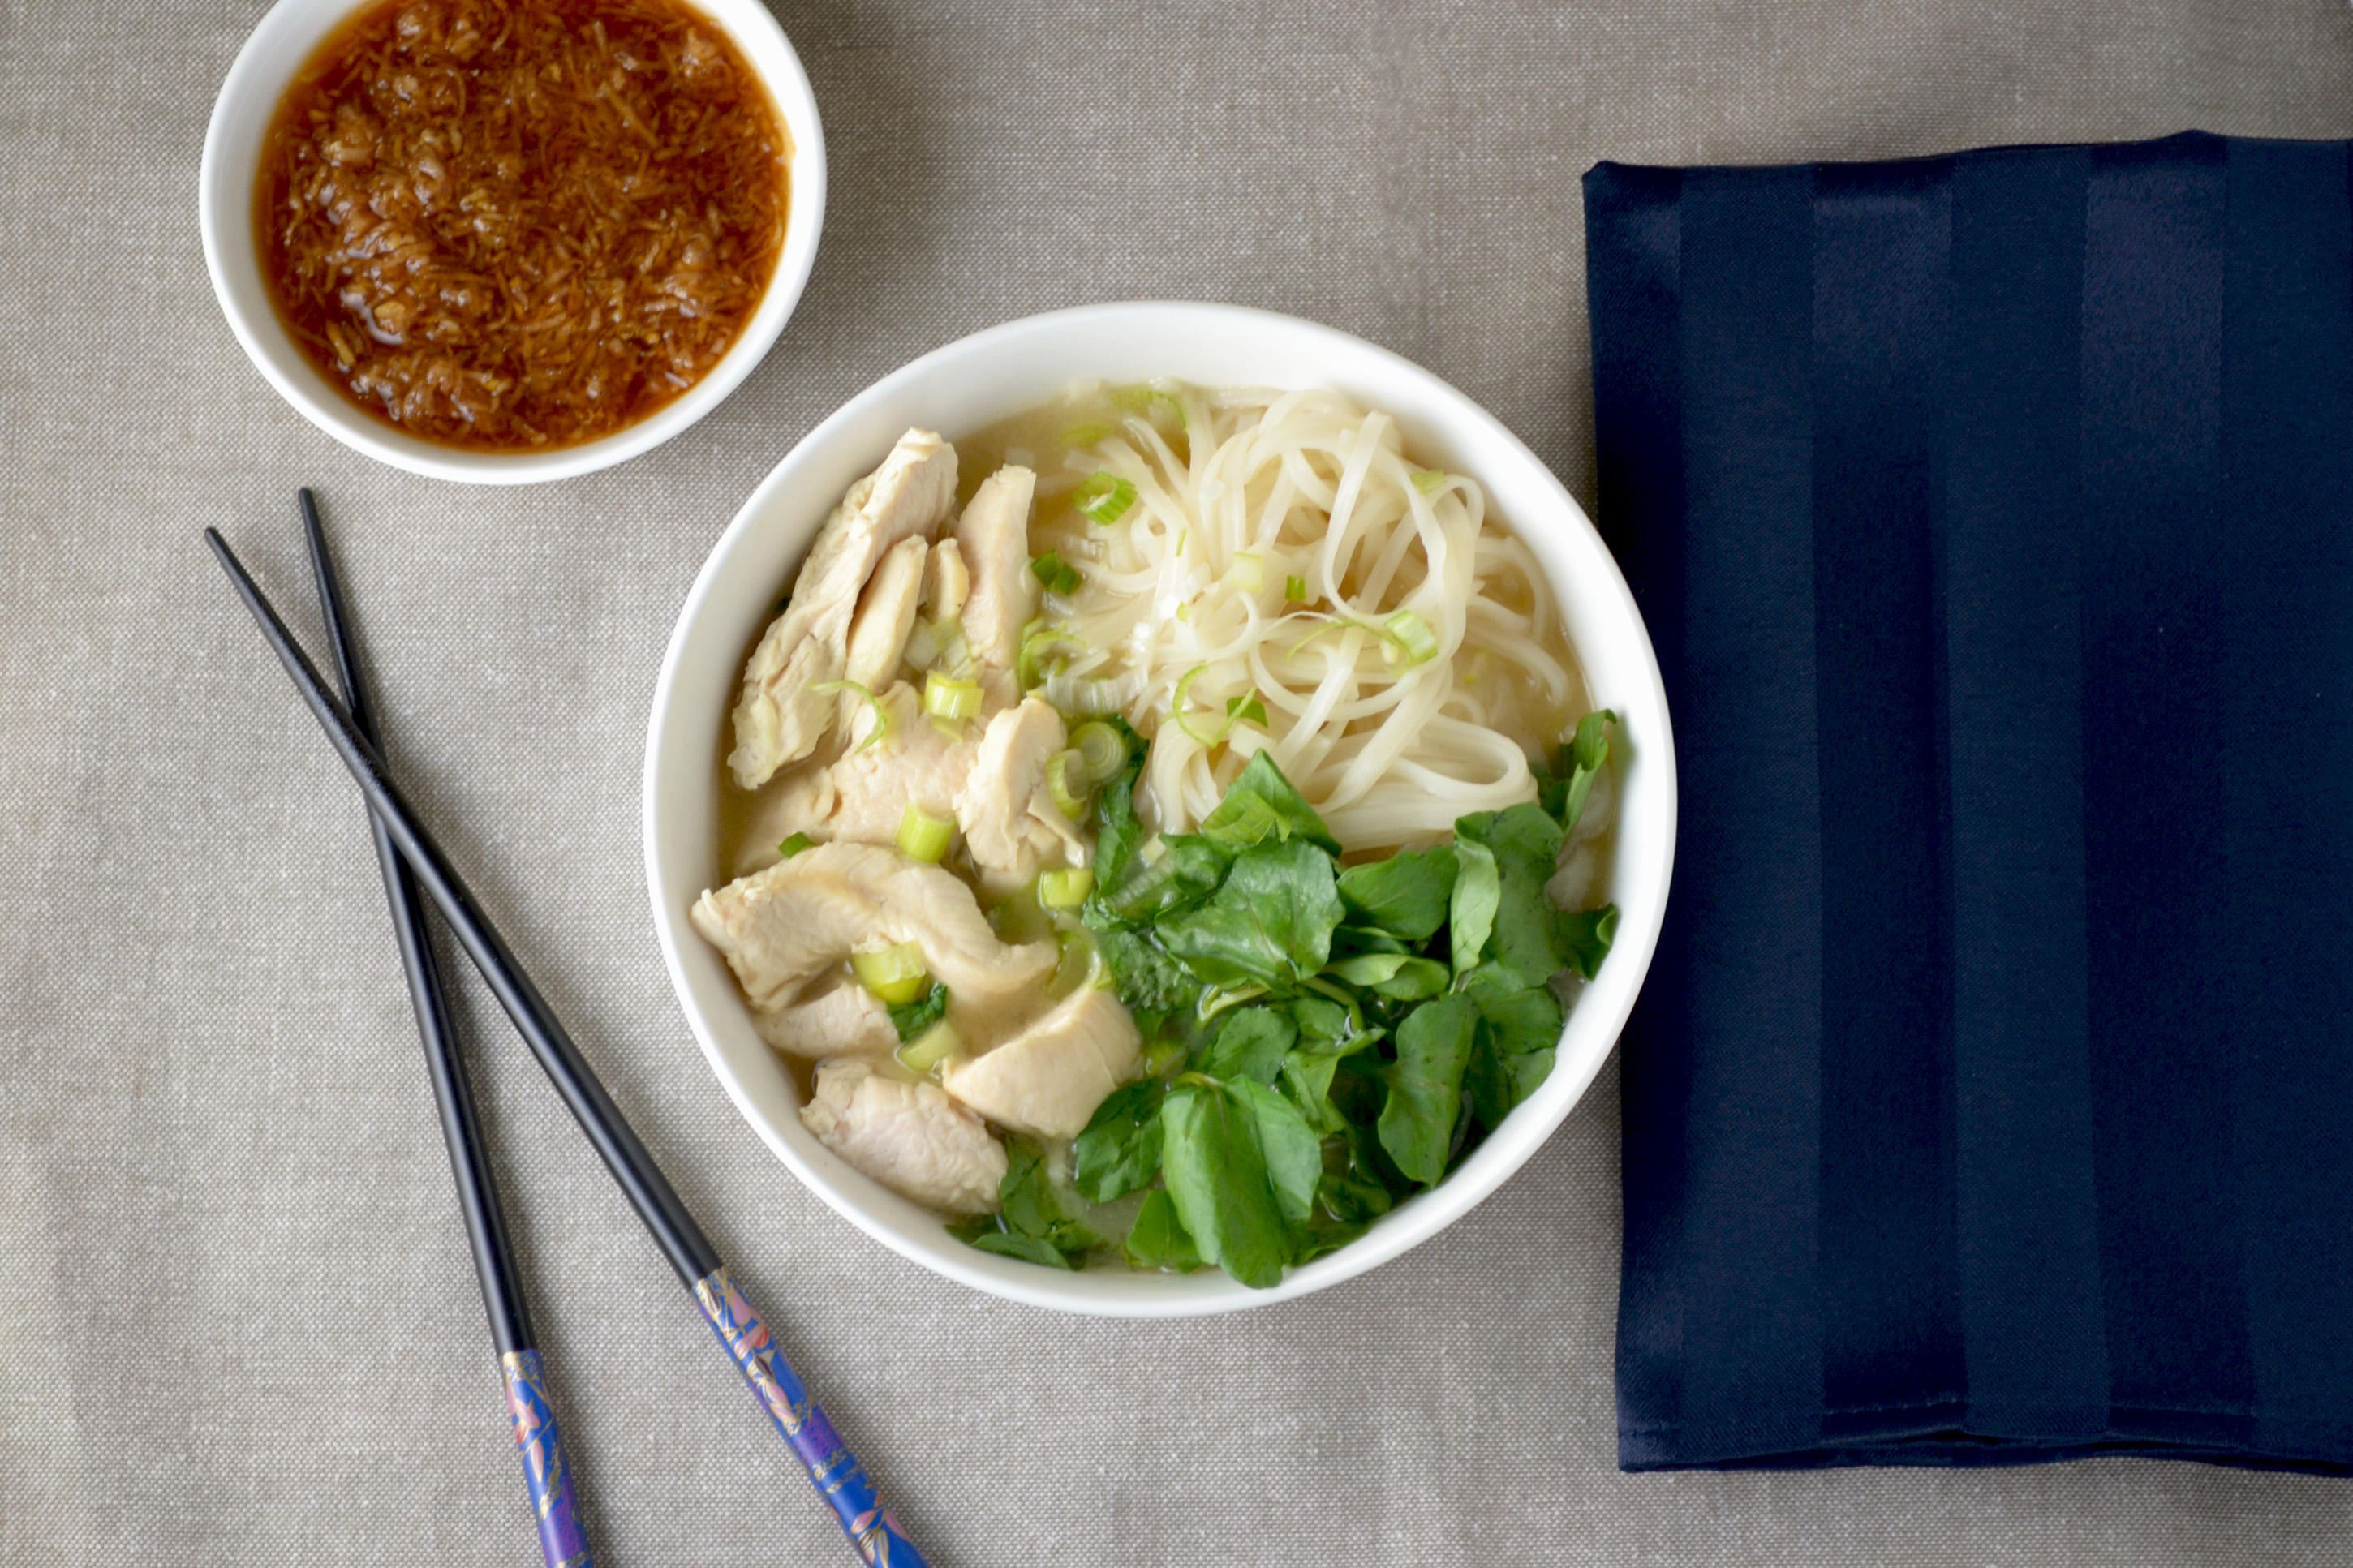
MitzutakiIt’s officially soup weather here in the Northeast. Now that the days are shorter and less likely to get above 50 degrees, hot soup is a favorite staple in our diets again. As the warmth of the summer sun becomes a distant past, soup as well as hot beverages are like comforting familiar friends that make the increasingly cold weather bareable. That and all of the delicious holiday food, of course.

My grandmother had many tasty soup recipes both published (in “The Art of Good Cooking”) and unpublished. I have yet to try them all but I’ve been very happy with the ones that I’ve posted here such as Stuffed Cabbage Soup, Basil Vegetable Soup, Fresh Tomato Soup, and New England Clam Chowder. Soup recipes are also some of the easiest recipes to change and adapt to your preference. This Mizutaki recipe is a good example. It can be made with chicken, beef, or fish and other vegetables, such as enoki mushrooms, can be added as well. Similar to hot pot, the sauce is really the most important part. The chicken is cooked in the broth until just barely tender and then placed in soup bowls with spicy watercress and cooked vermicelli rice noodles. The broth is poured into the bowls and the meat and vegetables are dipped in the sauce before eaten. An intense combination of soy sauce, lemon, daikon, and ginger, the sauce balances the subtle light flavor of the broth.

Much like many of my grandmother’s ethnic recipes, it took some time to figure out the origin of this dish. The title is spelled Misu Taki in her book but after researching, it seems to be an adaptation of the lesser known Japanese Mizutaki dish. Written and tested in the 1960’s, this recipe must have been incredibly unique, especially with the use of daikon or chinese radish (a store that no longer exists, “Japanese Foodland Inc” on Broadway in NYC is listed as a source in her book and is noted as having “very good Japanese soy sauce”). But I can imagine my grandfather, a lover of all types of Asian food, enjoying this soup on wintery days in Harlem back when Chinese take-out was a novelty. My grandmother writes in the introduction of this recipe, “This is not the original version of misu taki – but it is my own, and very good I think.” It is still an easy recipe to make your own and still perfect for a cold winter-like day.

Ingredients:

1 1/4 cups grated daikon
1/2 grated ginger
1 cup soy sauce
2/3 cup lemon juice
6 cups well seasoned chicken stock
6 skinless boneless chicken breast, cut in 1 inch cubes
3 cups cooked vermacelli or rice noodles
3 cups watercress
3 scallions, chopped

Combine grated daikon, ginger, soy sauce, and lemon juice. Divide this mixture among small bowls.
Heat chicken stock in a heavy pot over medium heat until simmering. Taste for seasoning and correct, if necessary. Add chicken pieces all at once and cook only a few minutes, until chicken changes color. Be careful not to overcook. Turn heat off. With a slotted spoon, remove peices of chicken to serving bowls. Place cooked noodles and watercress in each of the bowls.

Reheat broth and boil for a few minutes, then remove from heat. Poor broth over chicken, noodles, and watercress. Sprinkle with scallion. Serve with small bowls of soy sauce mixture for dipping chicken.

Serves 6.

Adapted from “The Art of Good Cooking,” by Paula Peck.

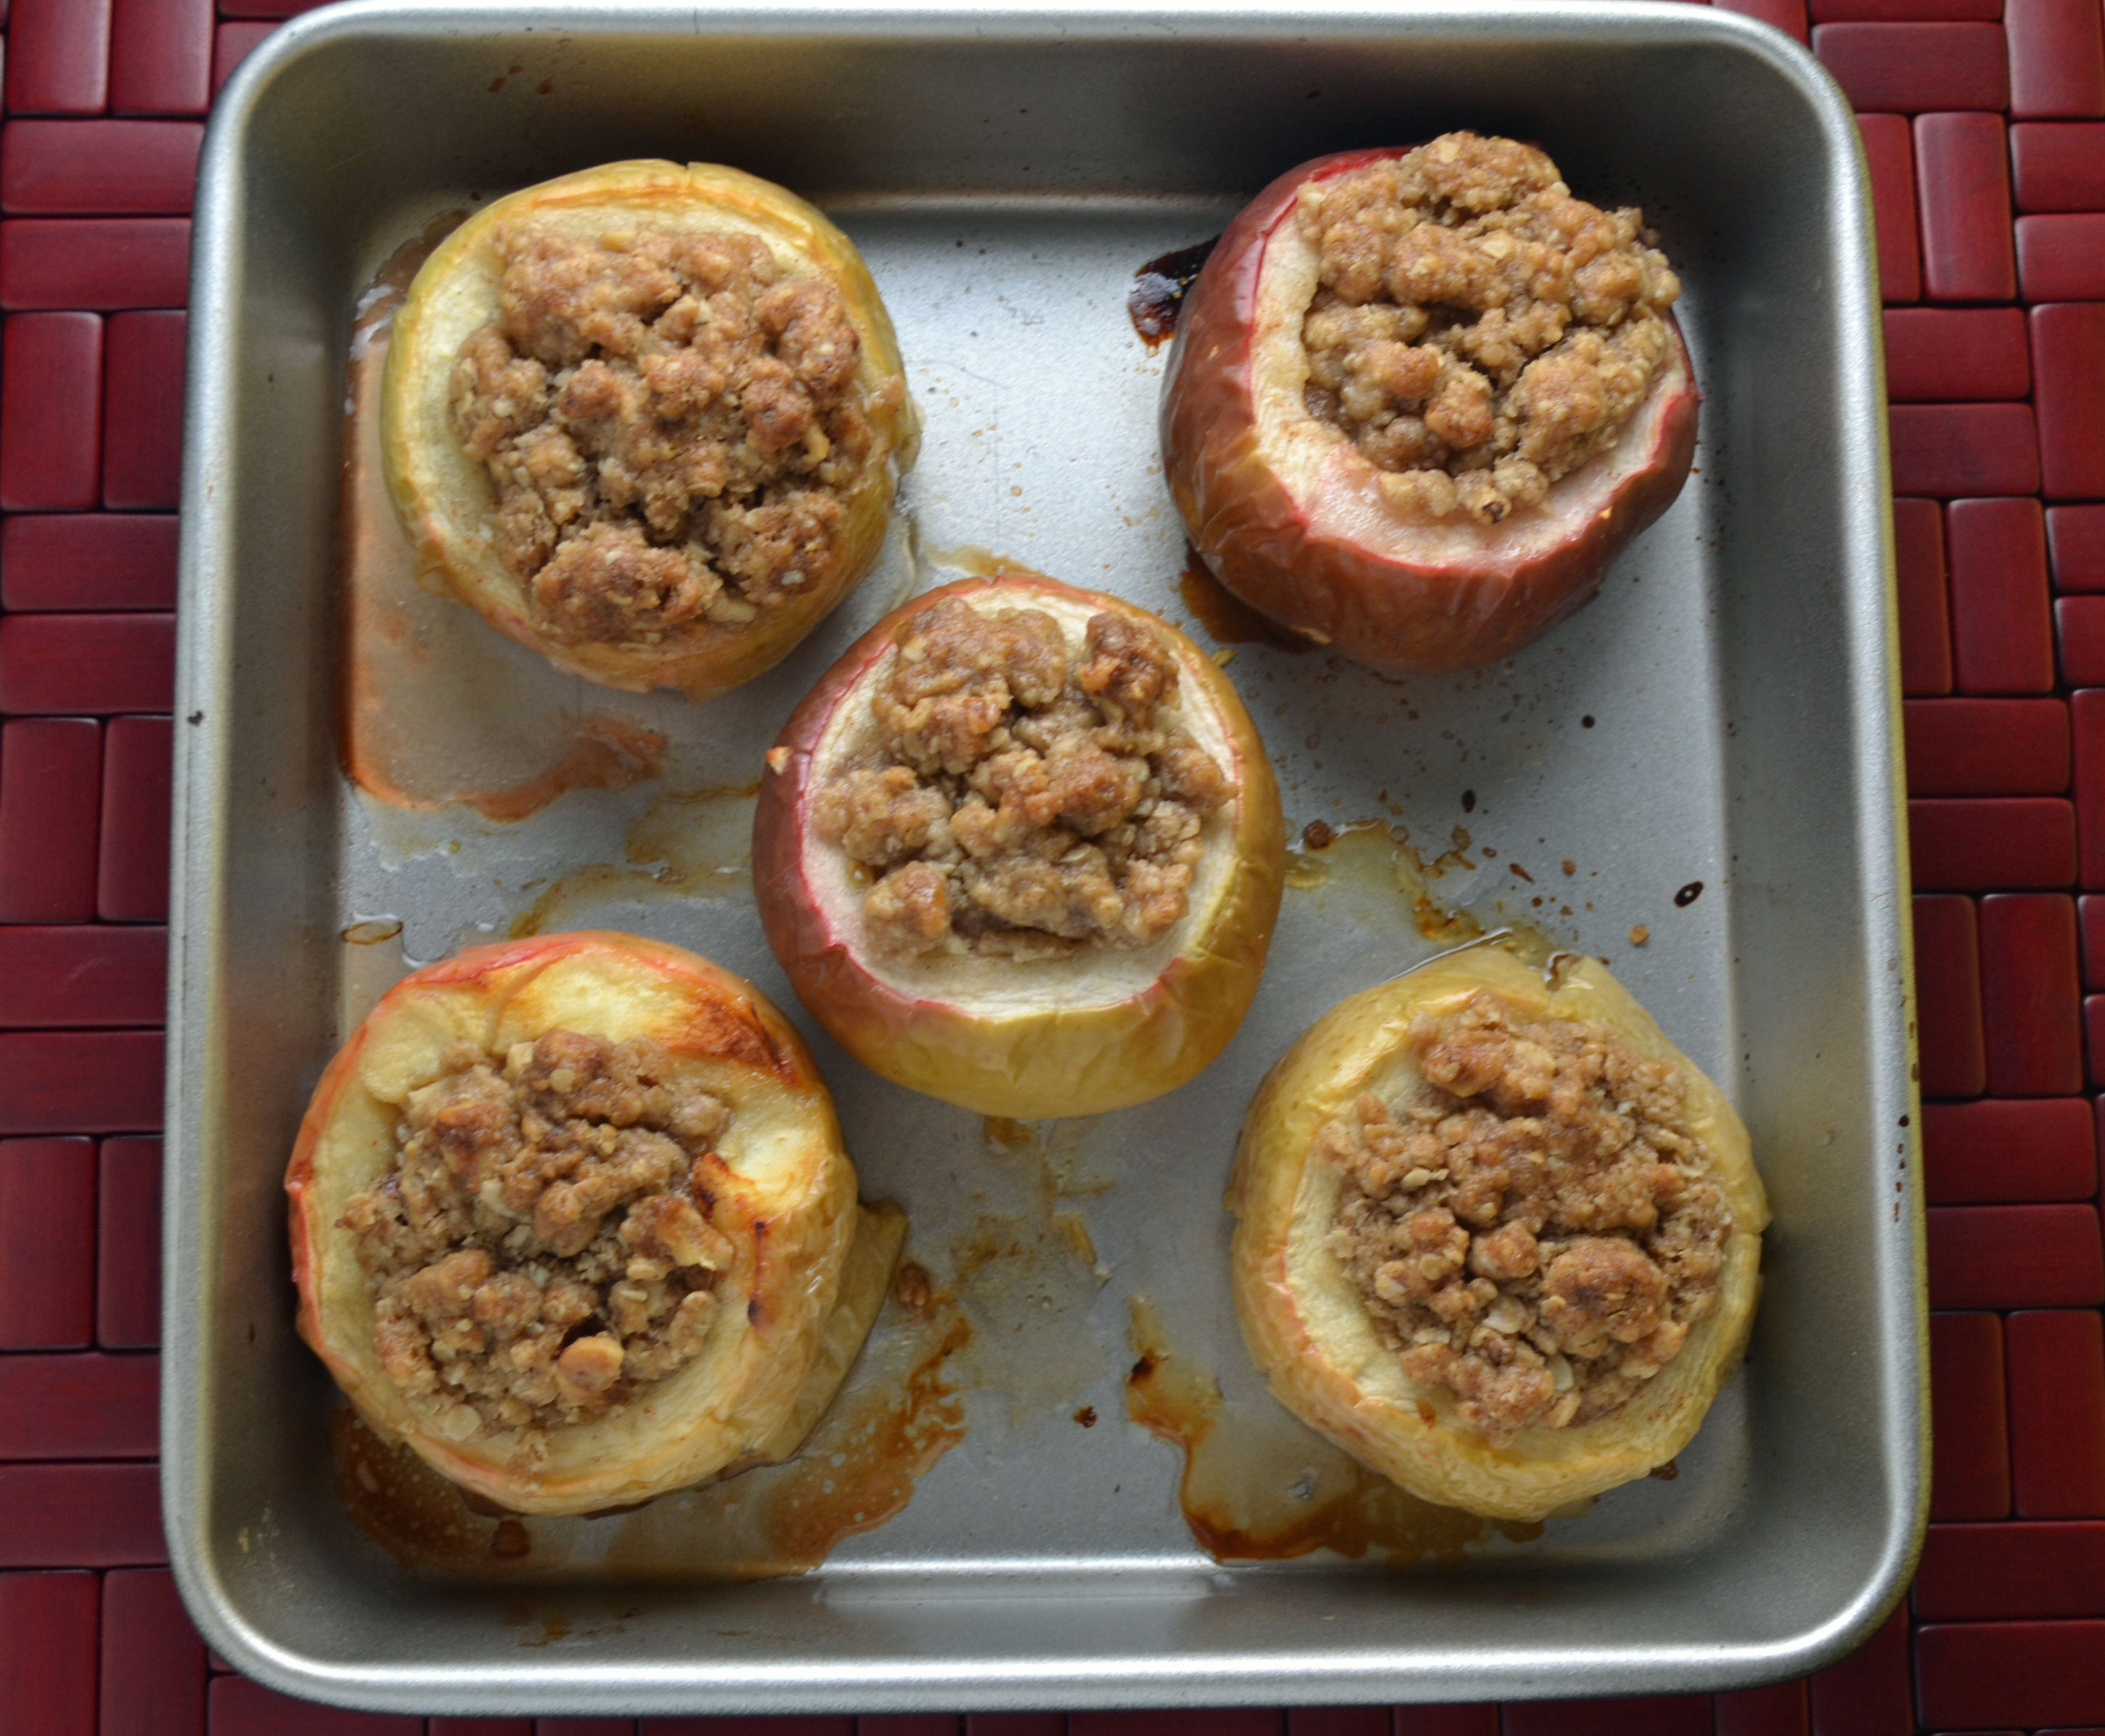
Stuffed Baked Apples with Homemade Caramel Sauce

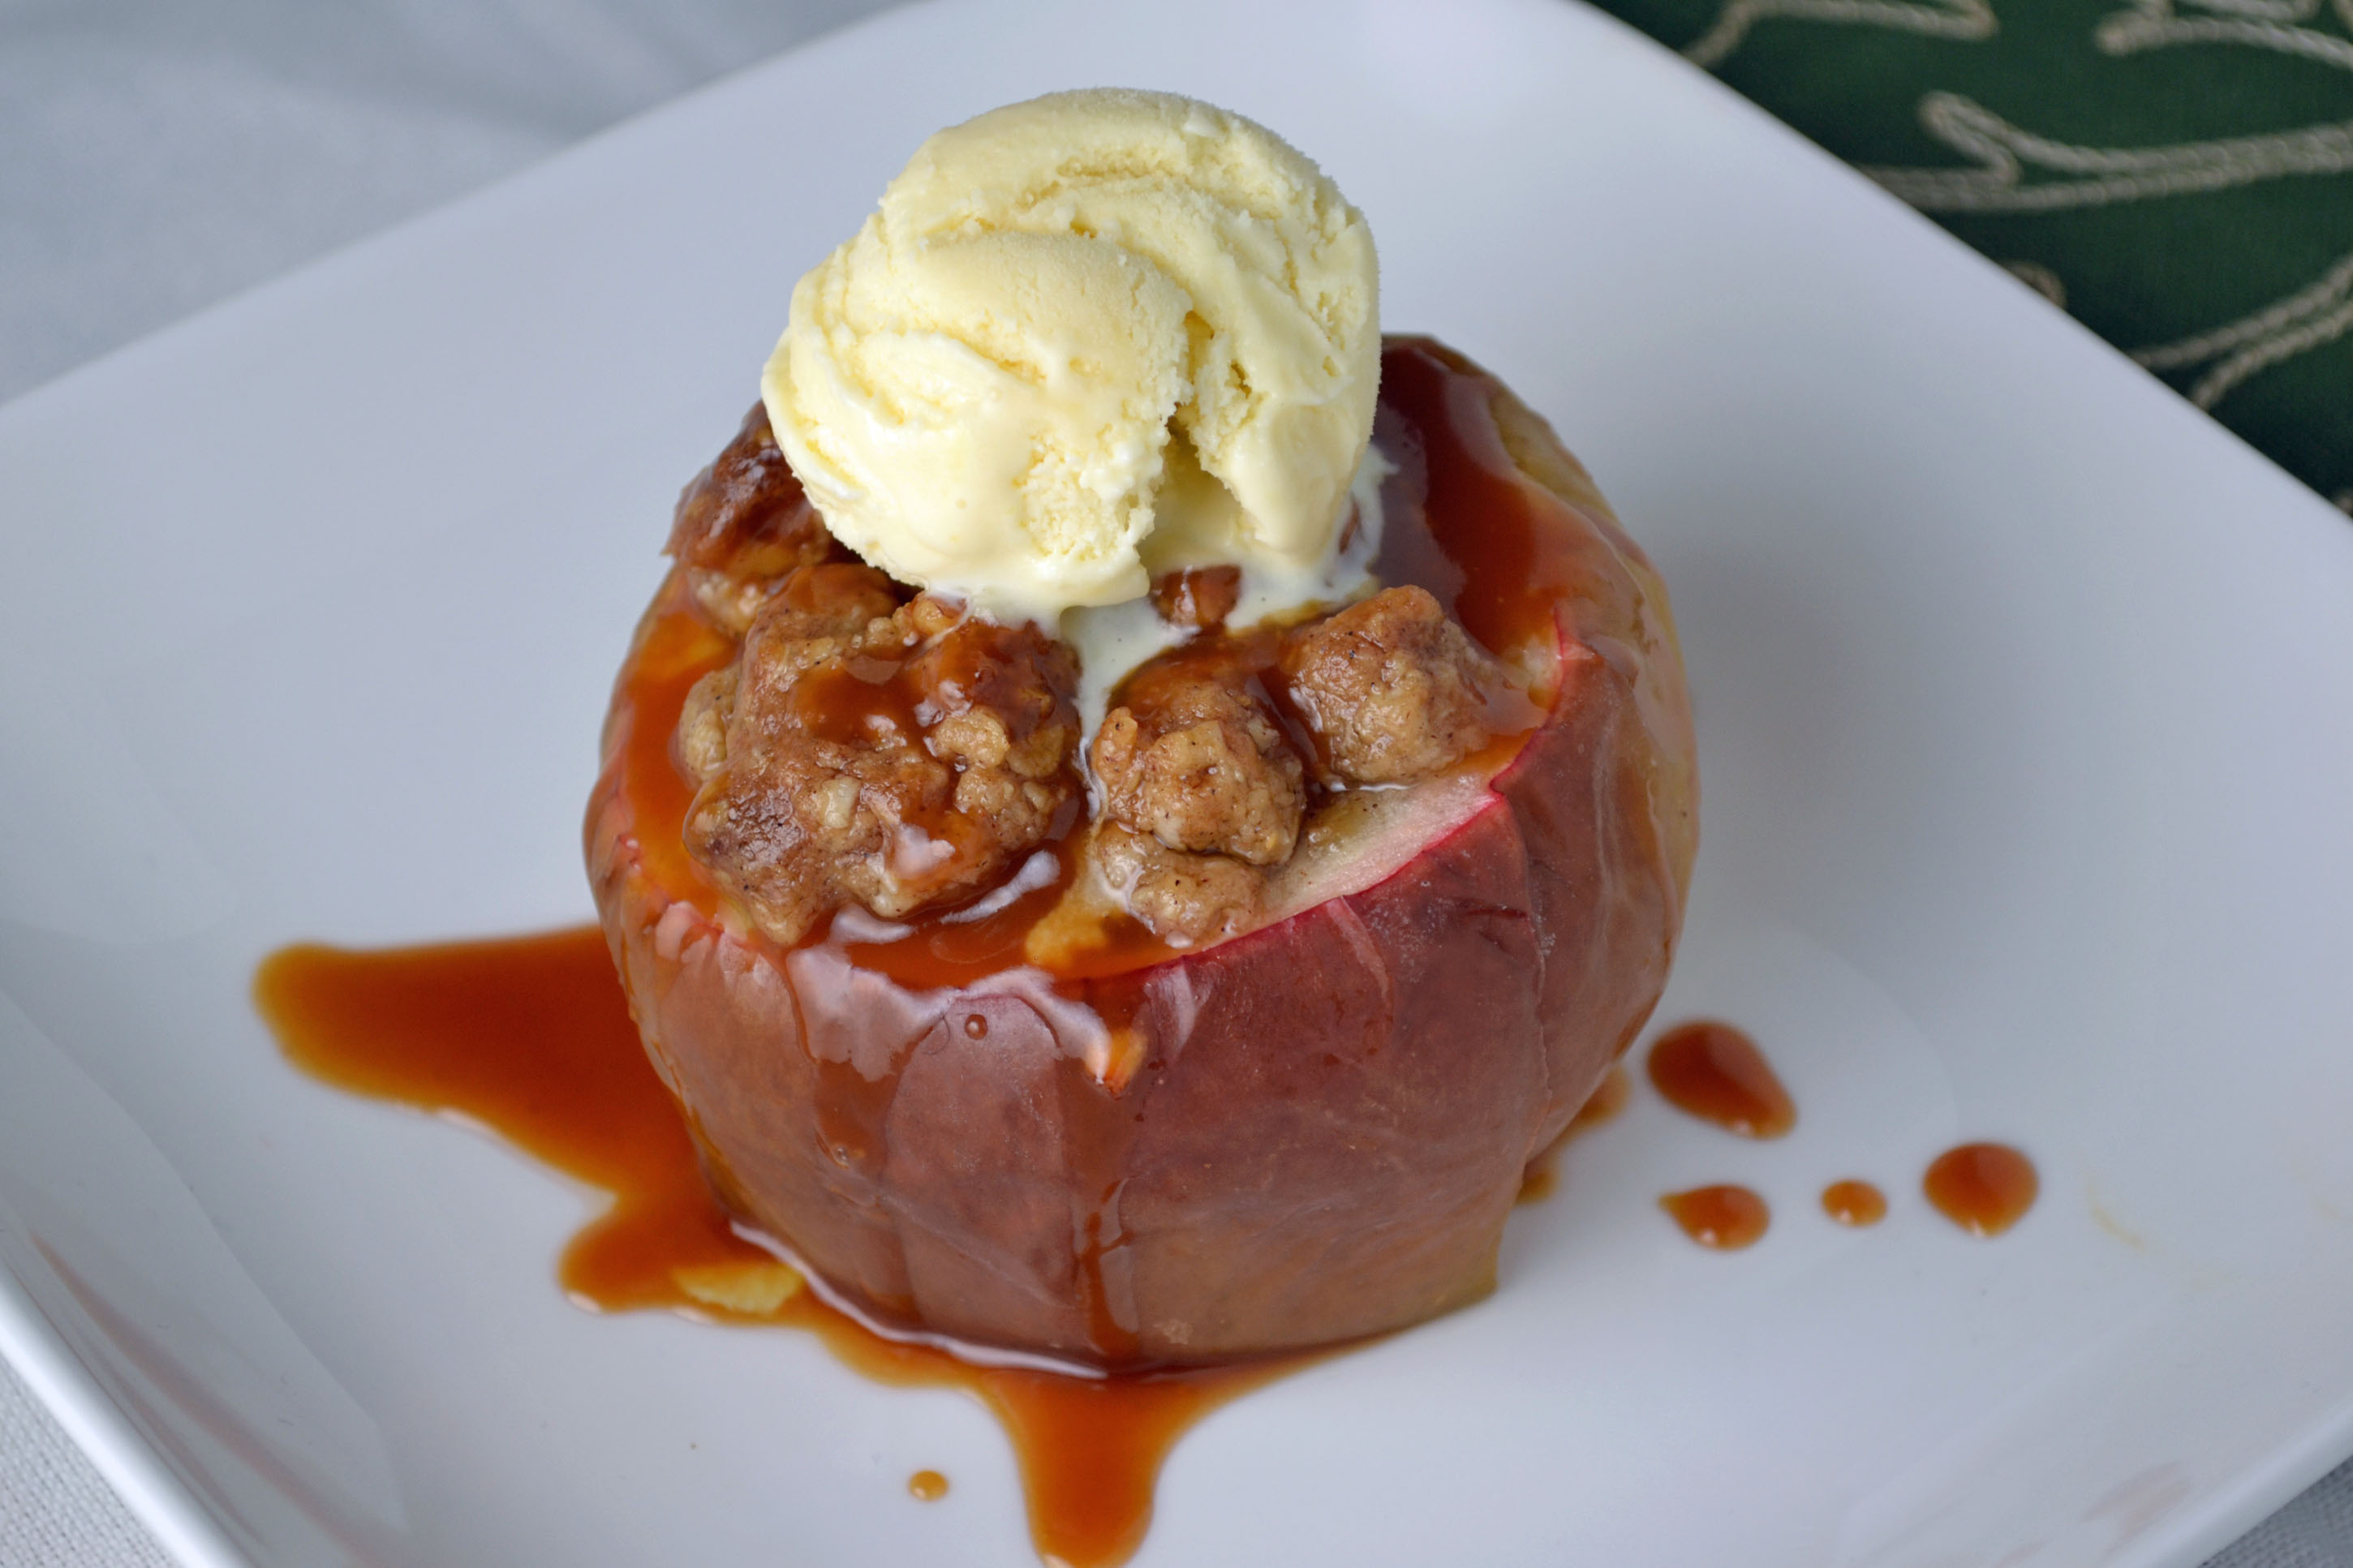
Stuffed Baked Apples with Caramel Sauce and Vanilla Ice Cream

This recipe might be over the top. It didn’t start out that way but before I could realize what was happening, I had created the most delicious and elaborate baked apples I have ever had. The plan was originally a minimalist approach. My grandmother doesn’t have a baked whole apple recipe (though she has many other apple recipes) but her mentor, James Beard has a very simple one in “The James Beard Cookbook.” It offers a few options of varying spices for the cavity of the apples but doesn’t venture as far as stuffing them. It even offers a flamed version which involves pouring heated alcohol over the apple and igniting it (“bring to the table blazing”) but I thought it might be best to avoid burning down my apartment building or at least the complaints of “fire smell” from the neighbors. Perhaps I will wait for a special occasion.

I settled for a simple spiced baked apple. But I couldn’t help feeling that something was missing or that it somehow lacked the excitement I was looking for. That’s when I decided to stuff it with crisp. Apple crisp is a favorite I make at least a few times every fall. It’s hard to go wrong with oats, sugar, butter, flour, and cinnamon so why not stuff a whole apple with this lovely crumbly topping? This simple baked apple was getting more interesting.

I then thought about those lonely parts of the apple that wouldn’t be exposed to the tasty crisp. Perhaps it needed a sauce? Enter my second favorite apple accompaniment: Caramel. And not just any caramel, easy homemade caramel sauce. Drizzled over the finished juicy baked apple stuffed with the cinnamon spiced crisp, it’s a combination to die for. I was already out of control so I topped the finished warm apple with a small scoop of vanilla ice cream. Melting into the crevices of the crisp and dripping down the sides of the apple while mixing with the caramel sauce, excessiveness never looked or tasted so good.

Ingredients:

1/2 cup all purpose flour
1/2 cup light brown sugar
1/4 teaspoon salt
1/2 teaspoon ground cinnamon
1/2 cup quick cooking oats
1/2 cup unsalted butter, diced
5 baking apples around the same size (I like Macoun or Honeycrisp)
1 lemon
cinnamon sugar

Caramel Sauce
1/2 cup granulated sugar
2 tablespoons unsalted butter
1/3 cup heavy cream

Preheat oven to 350 degrees. Lightly grease a shallow baking dish (large enough to hold all of the apples).

Combine flour, sugar, salt, cinnamon, and oats in a medium mixing bowl. Add diced butter and mix until well combined but still a little crumbly. Set aside.

Slice the tops off of apples. Carve out the core and some of the flesh, leaving about a 1/2 inch border. Slice lemon in half and rub the cavities of the apples with lemon to stop from browning. Sprinkle the cavities with cinnamon sugar.

Scoop crisp mixture into apples until full and rounded on top. Place apples in baking dish and bake for 30 minutes or until apples are soft and can be easily pierced with a fork (baking time may depend on the type of apples used).

To Make the Caramel Sauce:

Heat sugar over medium heat in a heavy saucepan until melted and amber in color. Be careful not to let burn. Add butter and whisk until combined. Whisk in cream (careful adding both cream and butter as it causes the mixture to seize and possibly splatter). Remove from heat and allow the caramel to cool slightly (it will thicken as it cools).

Drizzle caramel sauce over crisp stuffed apples and serve with vanilla ice cream (see Peach Melba recipe for a homemade version).

Baked Apples

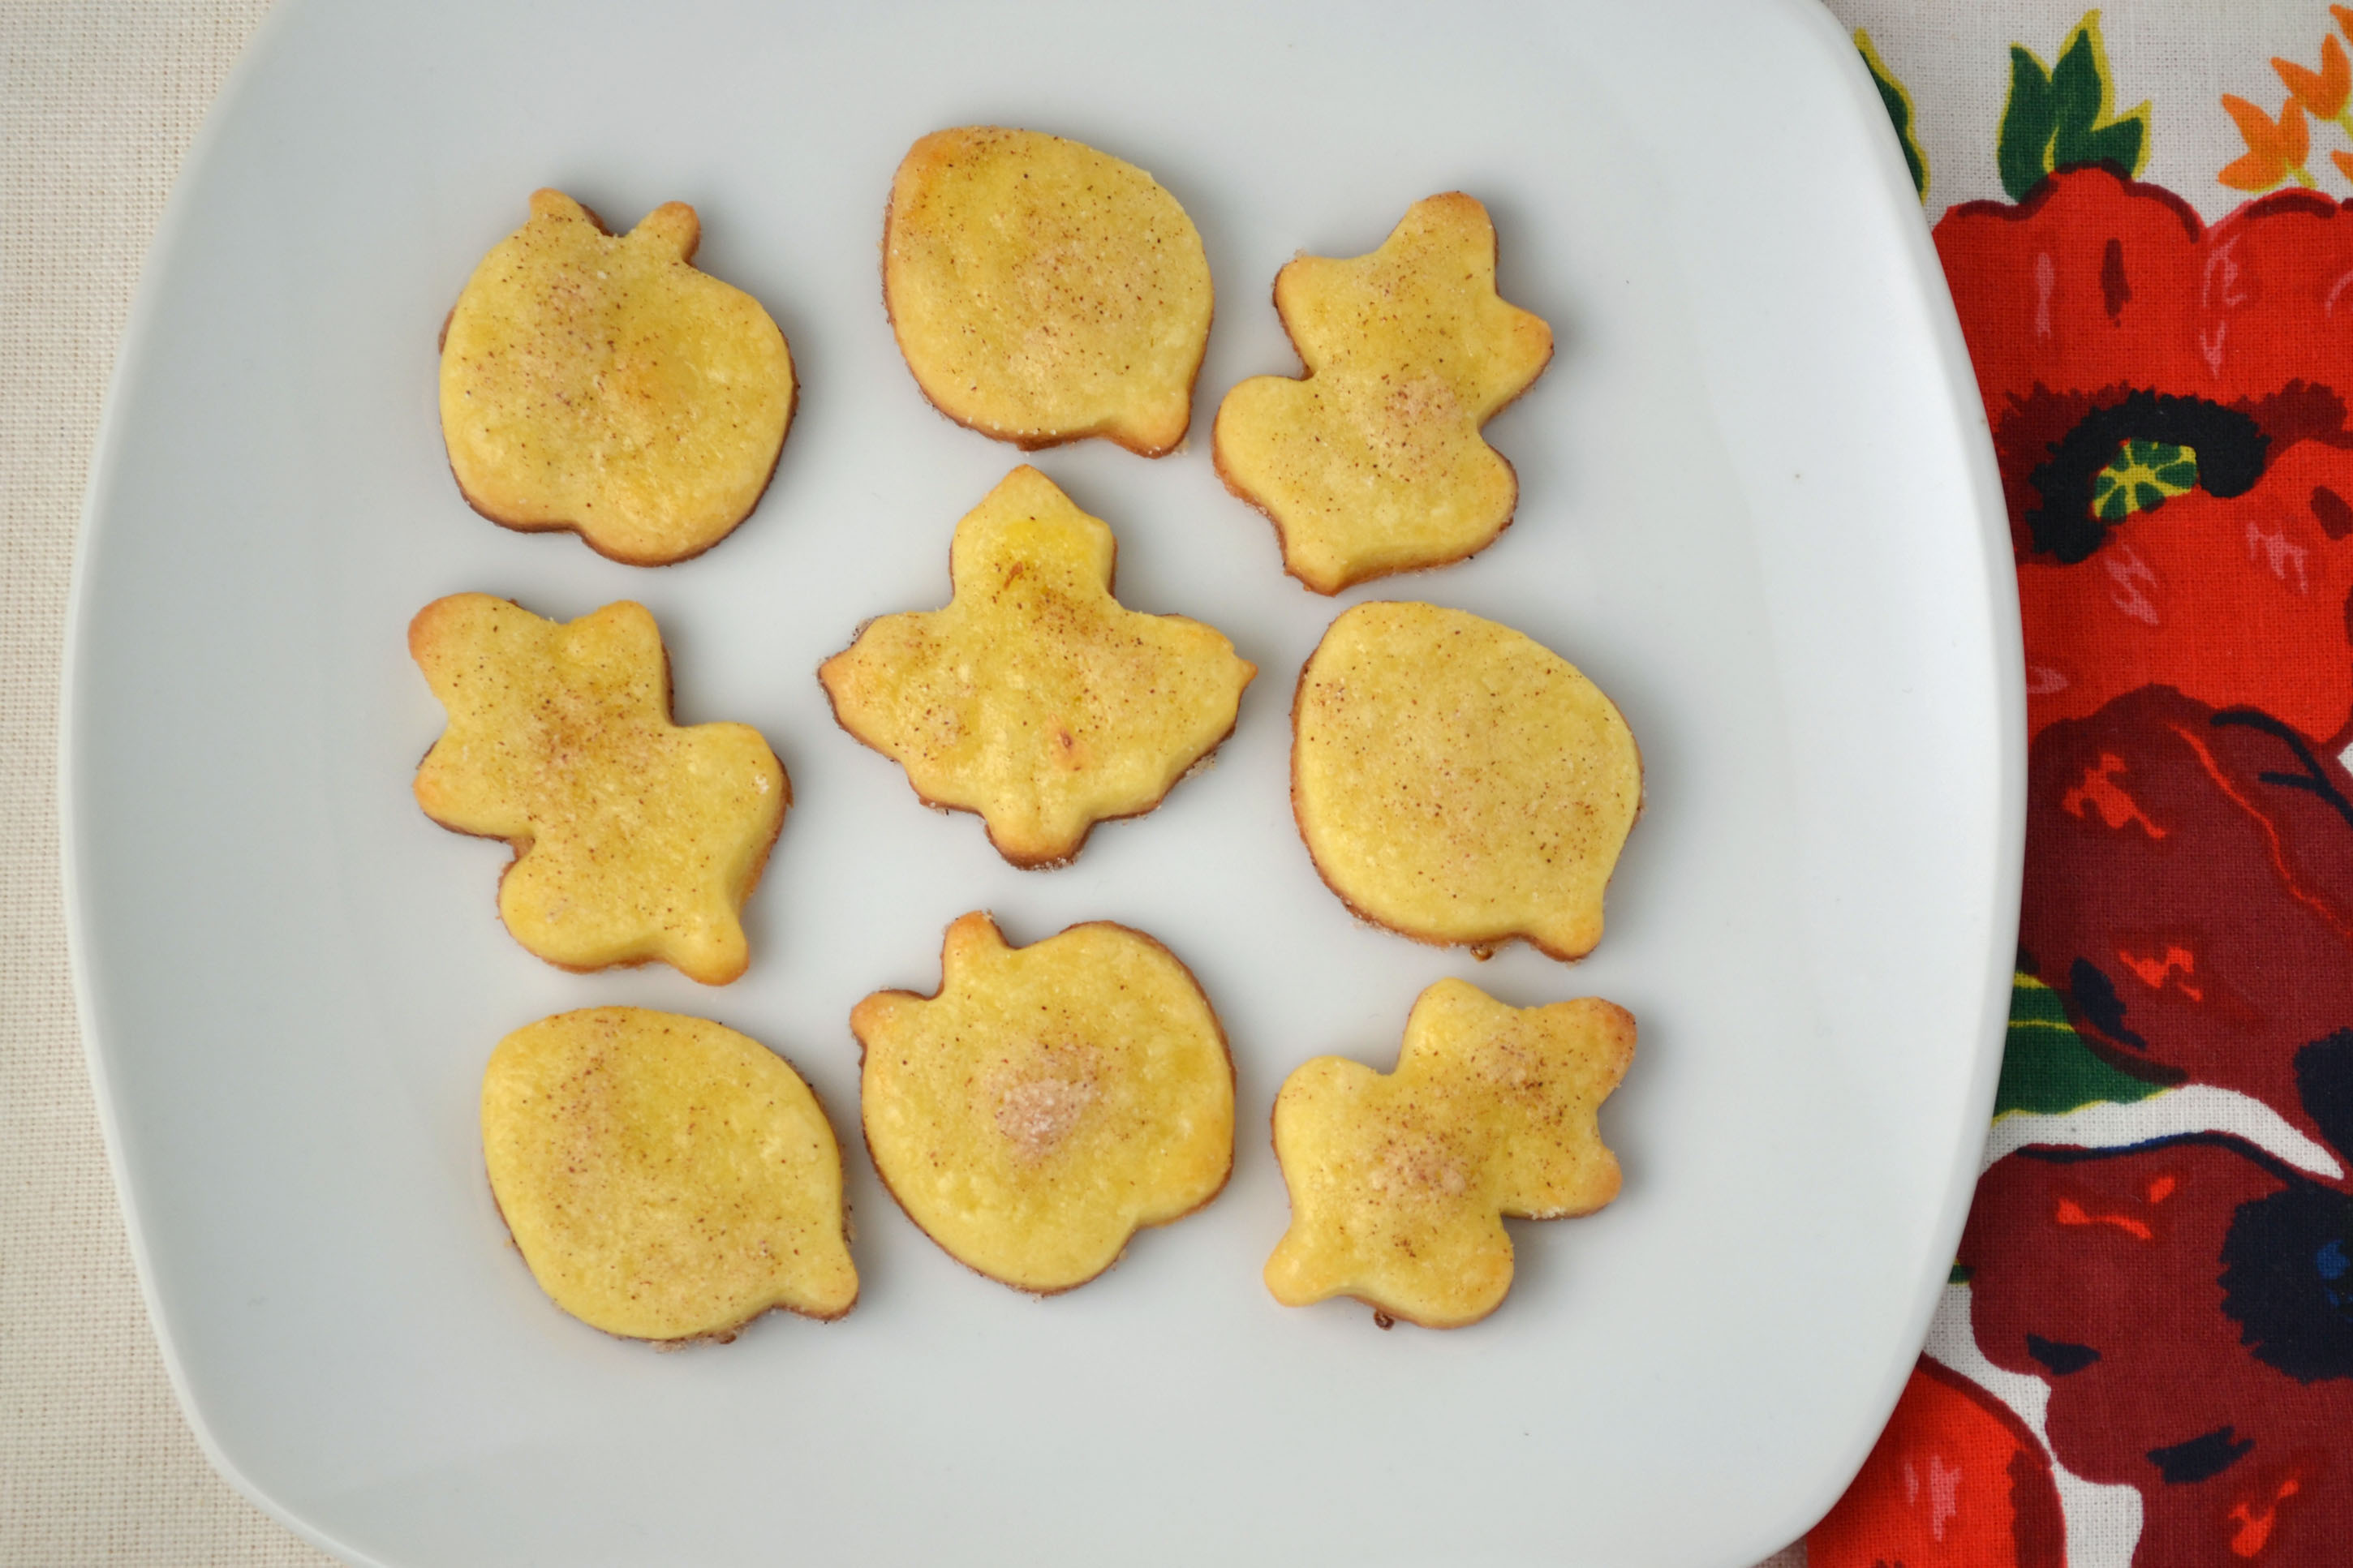
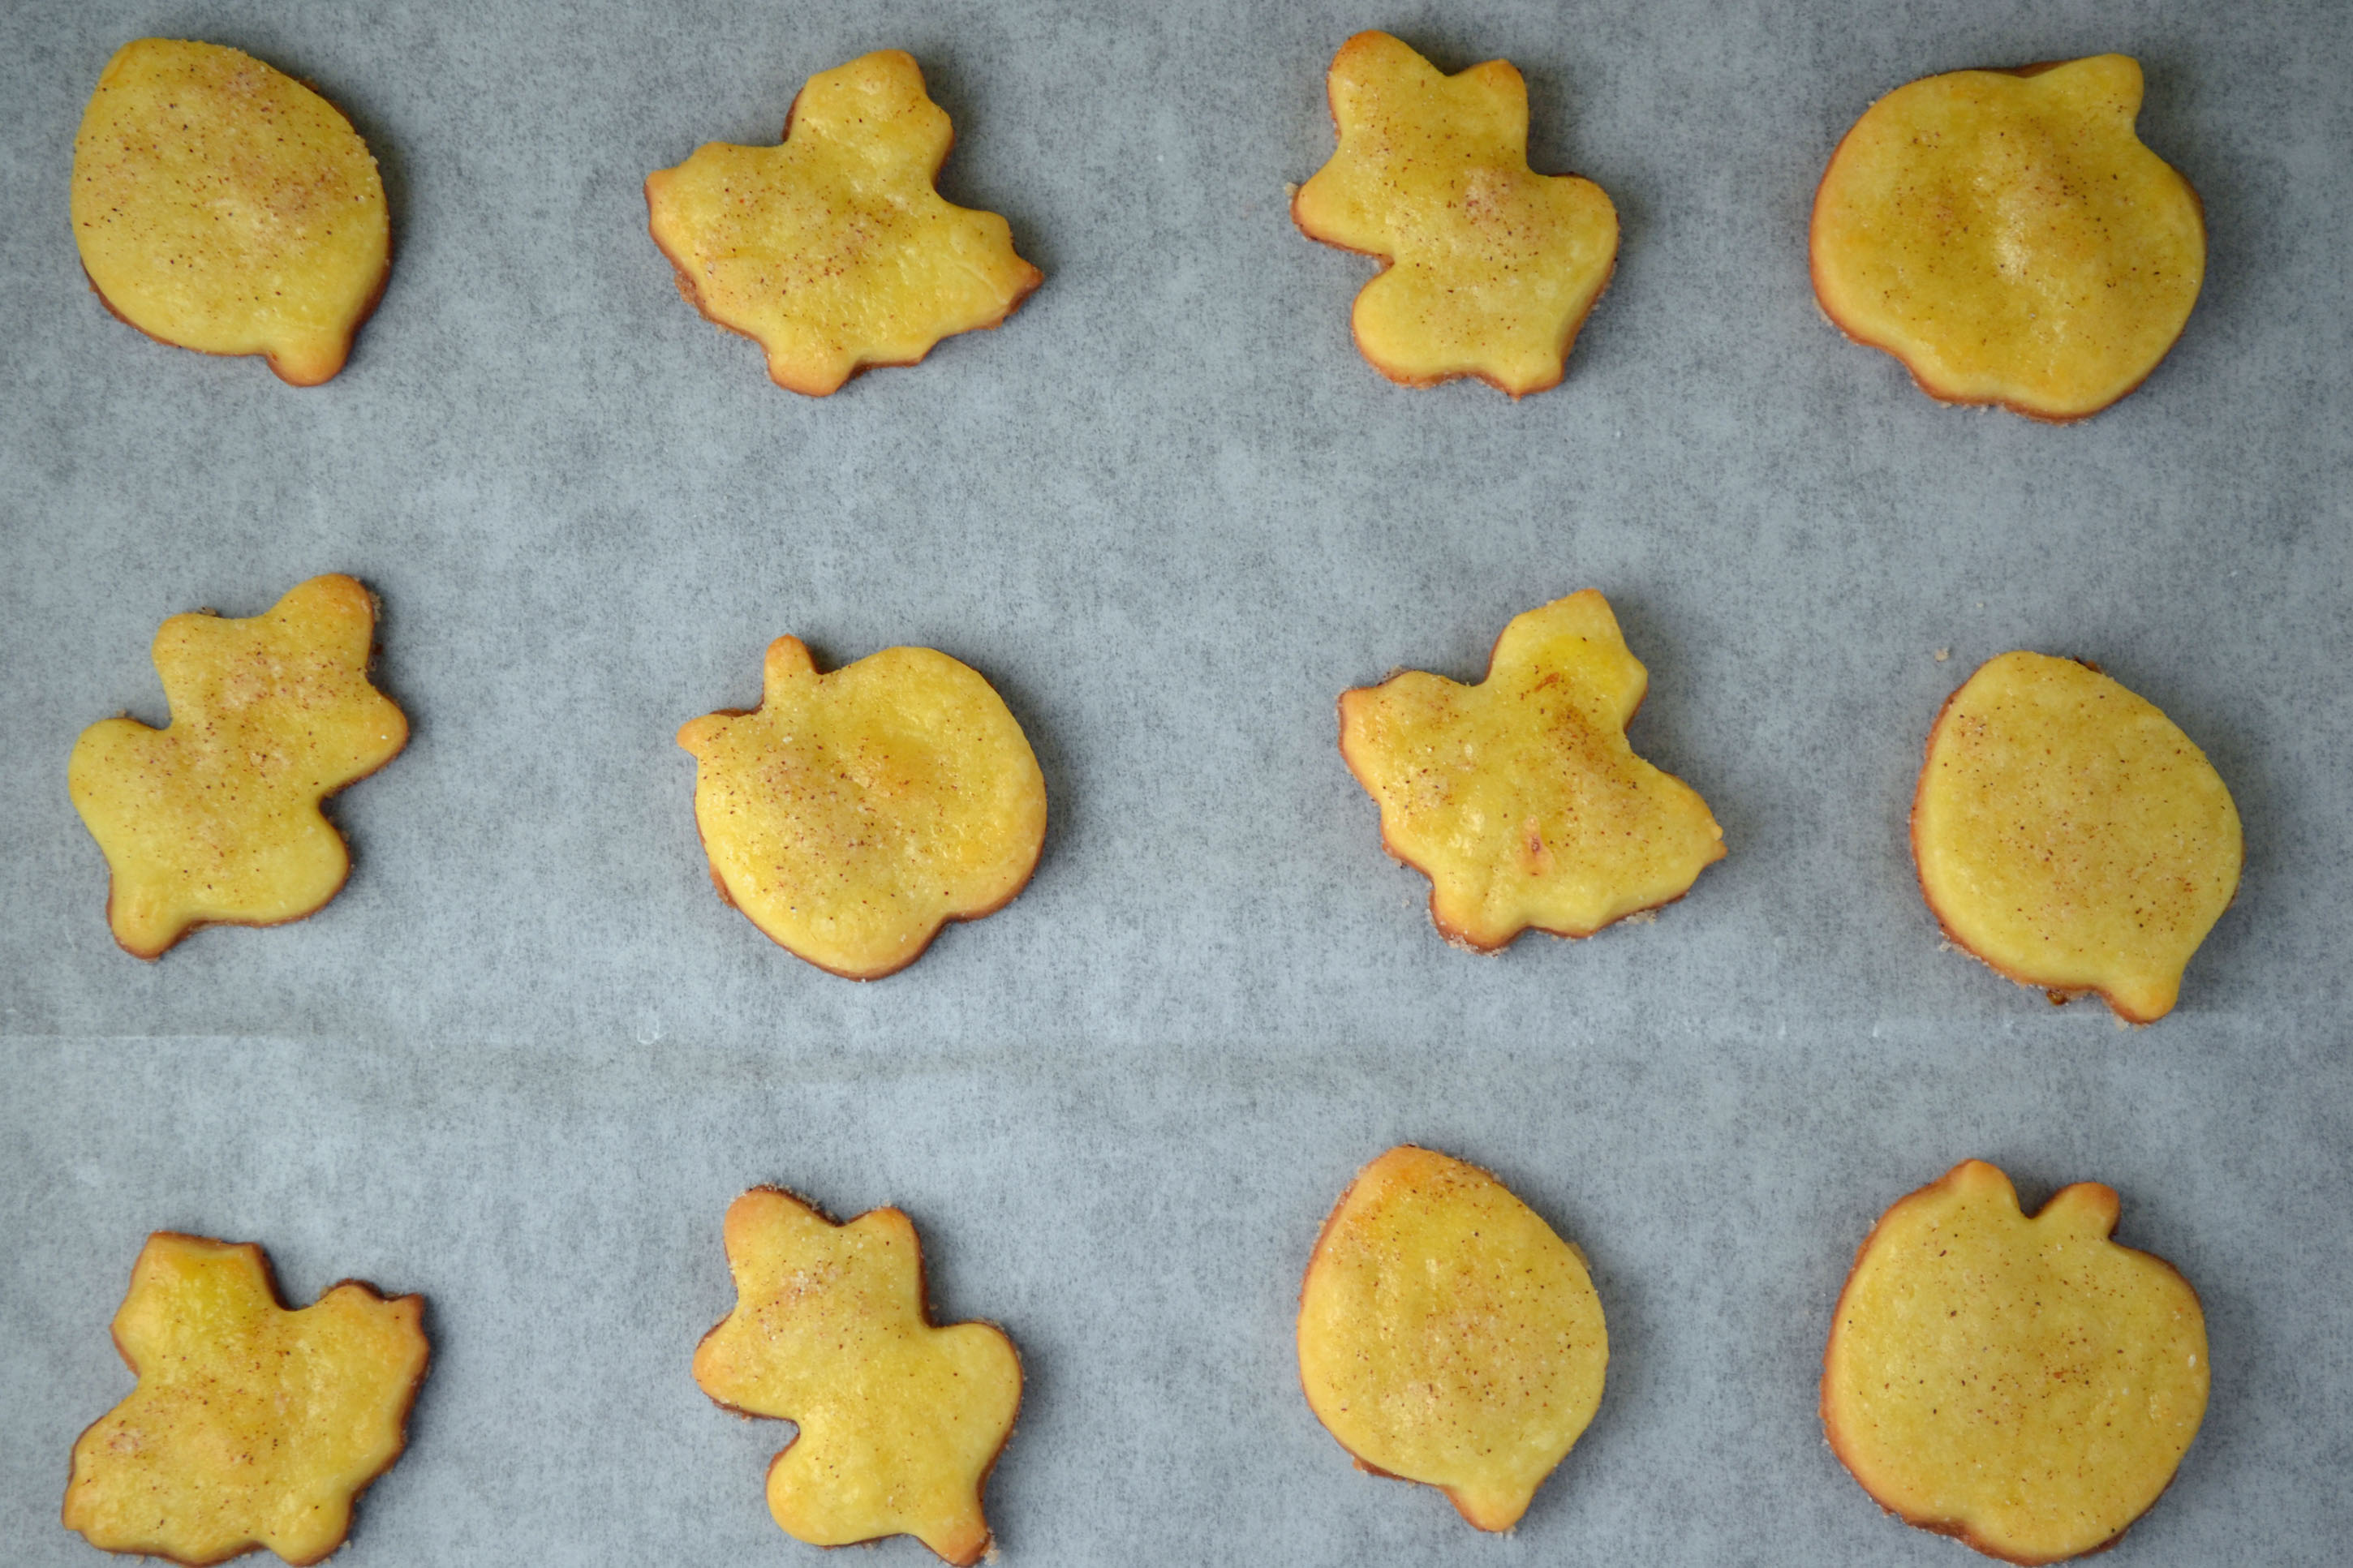
Polish Butter Cookies (Autumn Version)

Polish Butter CookiesI like to think of these as cut-out cookies for adults. They can be for kids too (perhaps the cookie shapes seem more childlike) but the buttery flavor is what differentiates these from those regular sugar cookies, often topped with bright colored sprinkles. It’s also the hardboiled egg yolks that bring out the richness in these sweet bites. My grandmother used this technique in many of her recipes for cookies and tarts. It may sound odd at first, to push a hardboiled egg through a sieve, but it adds a depth of flavor to the dough that is unlike anything else.

This recipe was originally brought to my attention by a reader who previously owned my grandmothers book, “The Art of Fine Baking.” Hidden in the cookie section, I had scanned over this recipe a number of times but wasn’t particularly inspired to try it. I’m glad I finally did. It is a versatile recipe that is so simple and basic, it can be used for a number of different occasions. The shapes of the cookies can vary from cutout stars and crescents, to Holiday specific ones such as witch’s hats for Halloween or gingerbread boys for Christmas. I chose these cute little fall shapes because they seemed appropriate for the chilly autumn weather and falling leaves.

The toppings are also up to you. My grandmother recommends cinnamon sugar or poppy seeds. I will eat cinnamon sugar on almost anything so this was a natural choice for me but poppy seeds, chopped nuts, or even those different colored sprinkles (if making them with kids) would be tasty as well. You will be surprised how something as simple as little butter cookie cut-outs will disappear so quickly from the kitchen counter (especially if you accidentally toss half of them on the floor like I did – oops). Good thing it’s a large recipe!

Ingredients:

1 cup unsalted butter
3/4 cup sugar
5 hardboiled egg yolks, pushed through a sieve
1 teaspoon vanilla extract
2 cups sifted all purpose flour
1/2 teaspoon salt
1 whole egg mixed with
1 teaspoon milk

Toppings:
cinnamon sugar
finely chopped nuts
poppy seeds

Cream butter and sugar. Stir in sieved hardboiled egg yolks, vanilla, and then flour mixed with salt. Chill dough for 1 hour.

Preheat oven to 350 degrees and lightly grease or line a baking sheet with parchment paper.

Flour counter top or work surface. Roll out cookie dough 1/4 inch thick. Cut cookies with cookie cutters into small crescents, stars, or other shapes. Transfer to a cookie sheet, leaving about an inch between cookies. Brush with beaten egg and milk mixture. Sprinkle with toppings of your choice. Bake about 8-10 minutes or until cookies are lightly browned.

Yield approximately 48 cookies

Adapted from “The Art of Fine Baking,” by Paula Peck

Autumn Polish Butter Cookies

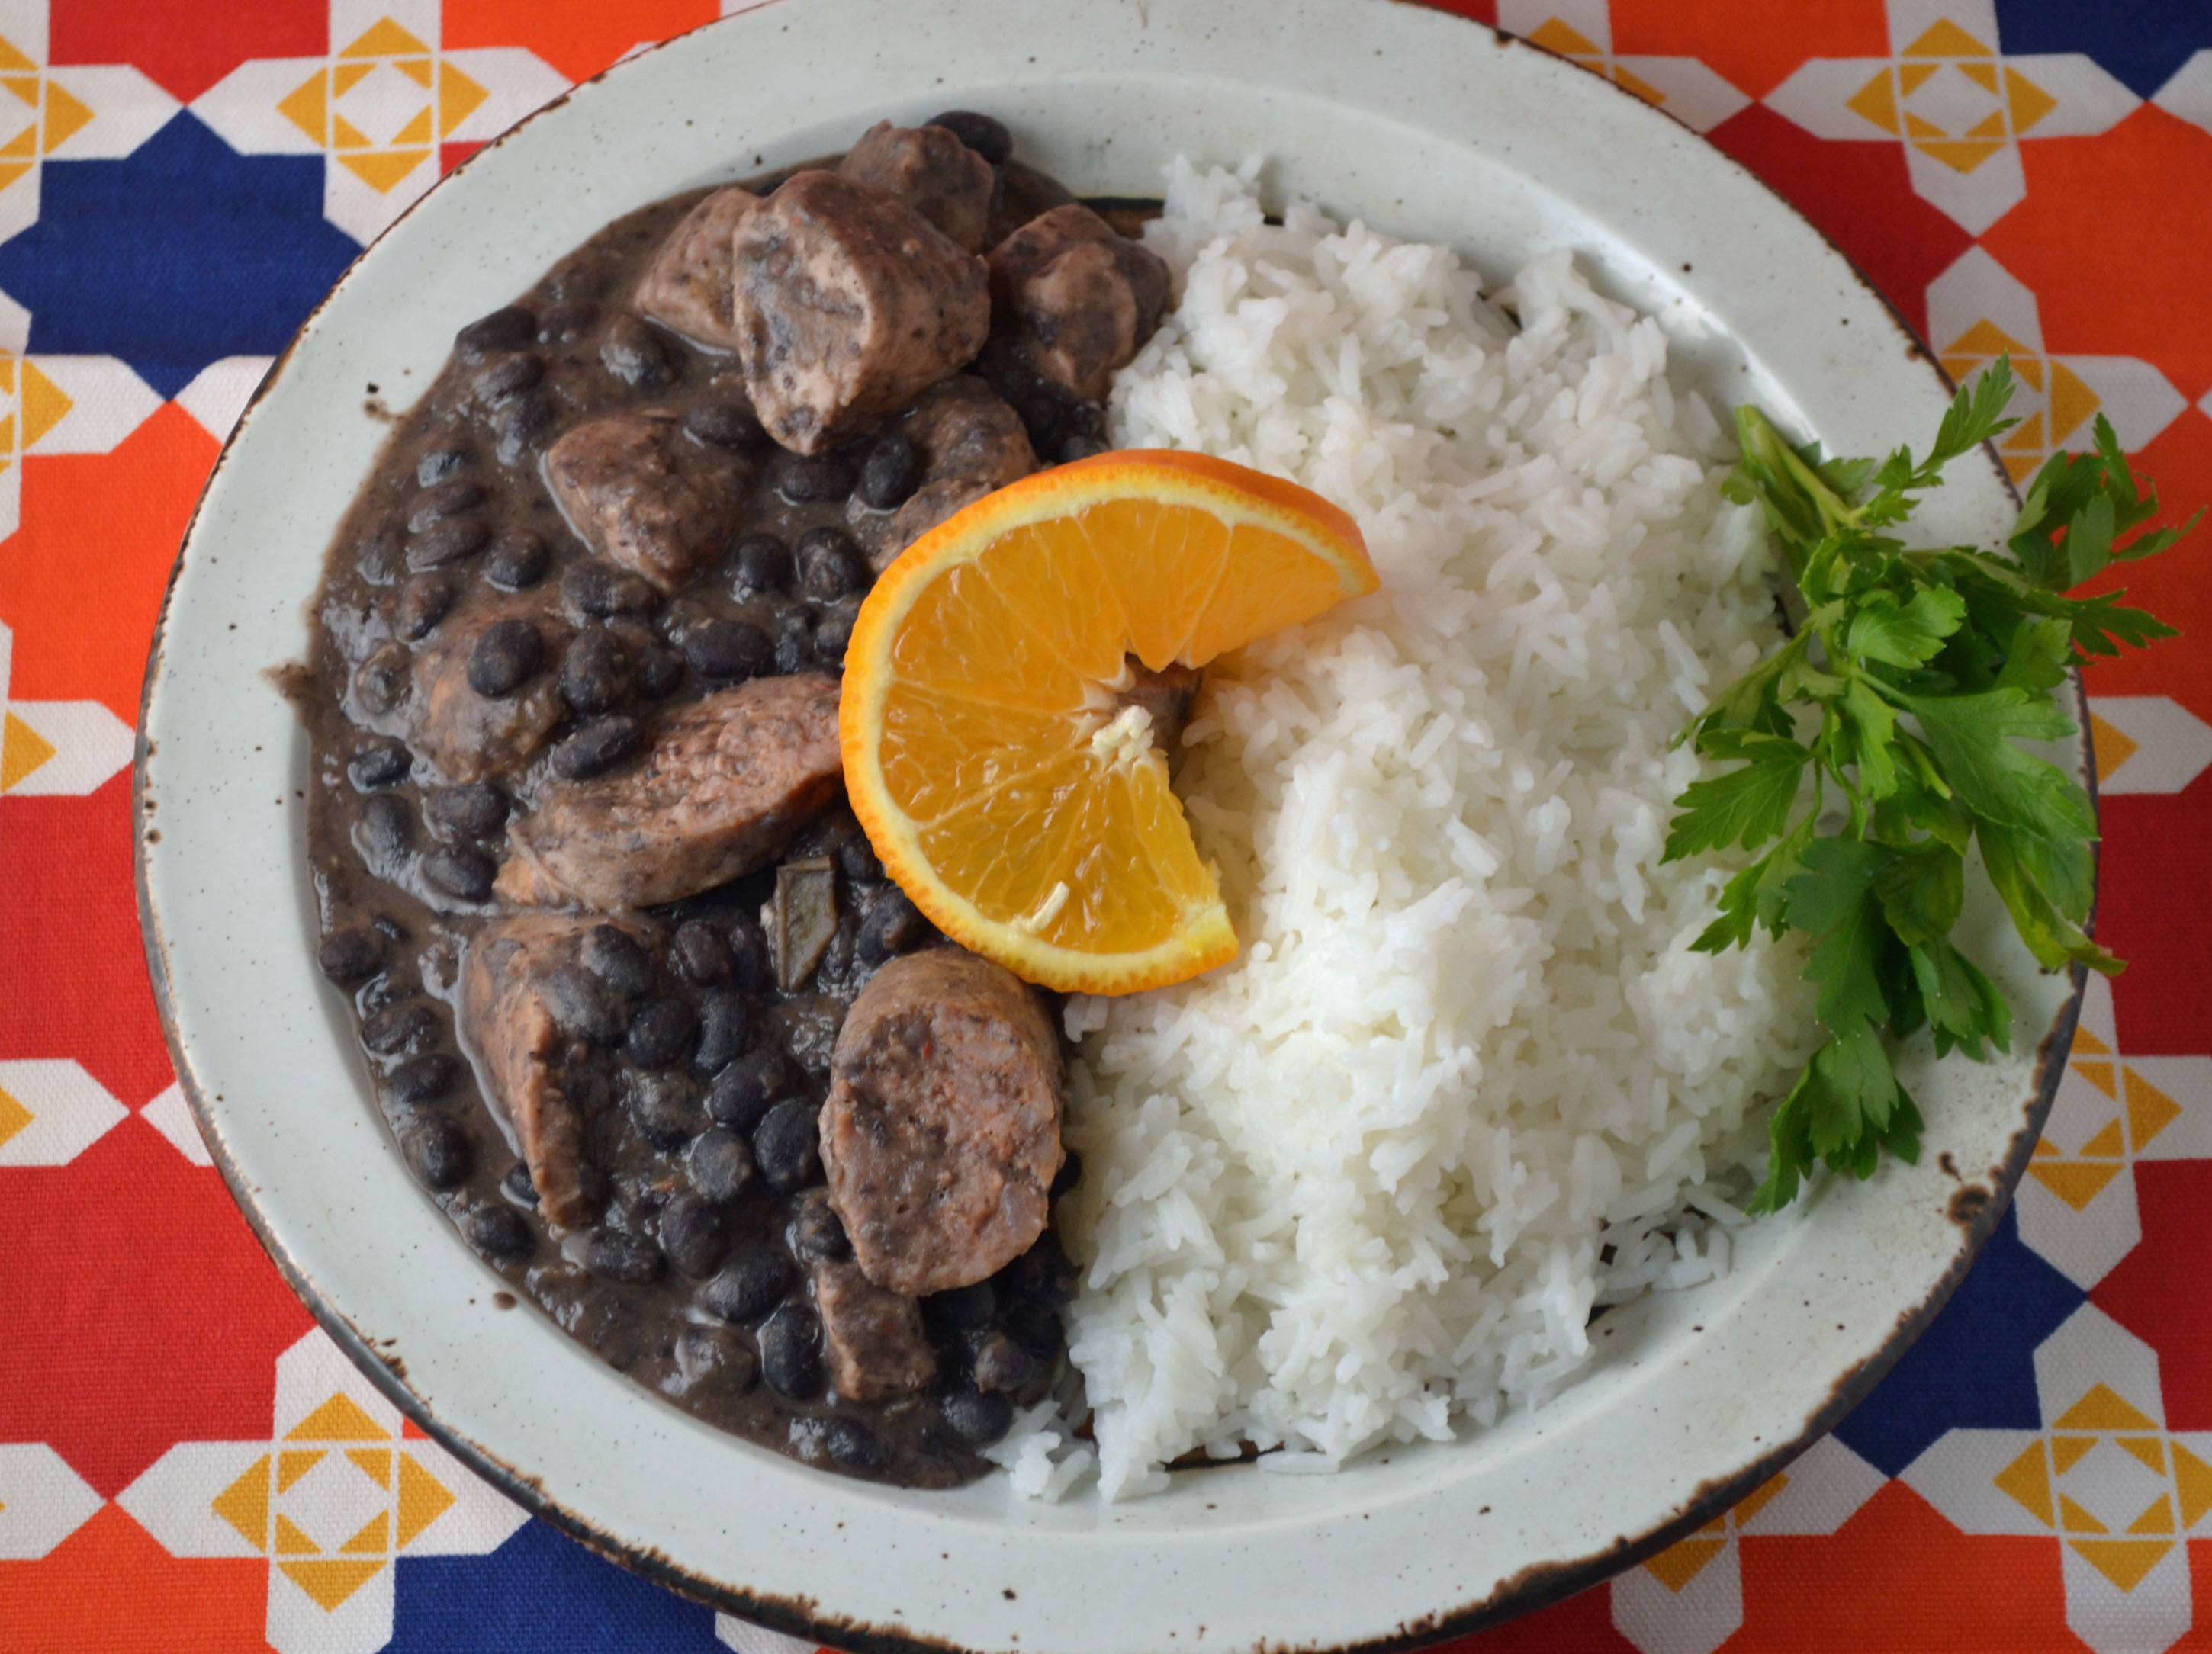
Pork and Black Beans with Rice

Pork and Rice with Black Beans

I have to admit this was a difficult dish to make look as good as it tastes. This is basically classic Latin American comfort food, Paula Peck style. I refuse to credit a specific country in Latin America for Pork Black Beans and Rice because so many of them have their own version. I would hate to offend one country if this is not their authentic preparation, or leave another out that makes a similar version. One thing’s for sure, it’s hard to go wrong with black beans and rice on a chilly fall day. In this case, the addition of pork sausage and chunks of pork tenderloin give this dish a salty meaty flavor and also makes a protein packed meal that keeps you full longer when you’re out raking leaves or picking apples.

My favorite part of this dish is the orange. That orange slice you see in the photo is not just for decoration and color, there is actual orange juice in this dish. It’s mixed with red wine to deglaze the pan (release all of those flavorful brown bits) after browning the pork. This is the acid and sweetness the salty fat of this dish needs to provide that balanced flavor our taste buds look for. So ignore the deceiving sloppy look of these pork and beans – serve with orange slices and these are far from the blah rice and beans you may be used to.

Ingredients:

2 cups dried black beans
1/3 cup olive oil
3 cloves garlic, minced
1 large onion, chopped
2 small green peppers, seeded and diced
2 teaspoons salt
1/2 teaspoon coarse black pepper
1 1/2 lbs pork shoulder or tenderloin, cut into 1″ cubes
3/4 lb fresh pork sausage
2/3 cups orange juice
1/2 cup red wine
1 1/2 cups peeled fresh orange slices

Wash, pick over beans and soak overnight or cover beans in water and bring to a boil for 2-3 minutes, remove from heat and cover for 1 hour. Drain.

Heat olive oil in a deep pot. Add garlic, onion, and green pepper. Saute until tender and season with salt and pepper. Add beans and enough additional water to cover them. Cover pot and simmer 45 minutes or until beans are tender, adding more water if necessary. Drain liquid from pot and reserve.

Remove two cups of cooked beans from pot. Cover remaining beans to keep warm. Puree the two cups of cooked beans with as much liquid as necessary in blender. Stir bean puree into cooked beans and keep warm.

Brown pork cubes and sausage in their own fat in a skillet. Pour off fat when meats are golden all over and cut sausage into 1-inch pieces. Add both meats to beans. Season with additional salt and pepper, if required.

Pour orange juice and wine into skillet that meats were browned in and cook on high heat until liquid is reduced by half, scraping up any brown bits. Pour into bean mixture and stir to combine all flavors.

Serve over fluffy, steamed rice.

Serves 6.

Adapted from “The Art of Good Cooking,” by Paula Peck.